Knitting Braided Pillowcases
Whipping up a bit of comfort in uncomfortable times
I’m not going to get too much into it, but for many the days are filling with uncertainty and fear. We knitters know the power of crafting and how it can uplift us and help us feel calm in the darkest of times. So I’ve started thinking of some quick projects that bring us comfort both while knitting them and afterwards. It was in this effort that I started thinking of knitting braided pillowcases.
On a previous trip my husband and I bought beautiful embroidered silk pillowcases. When we got home, I scrambled to find pillows to fill them. In my haste, I ordered the wrong size pillows from Amazon. Rather than return them, I kept them having a feeling that I’d like to knit some pillowcases for them.
Who knew this would be that time?
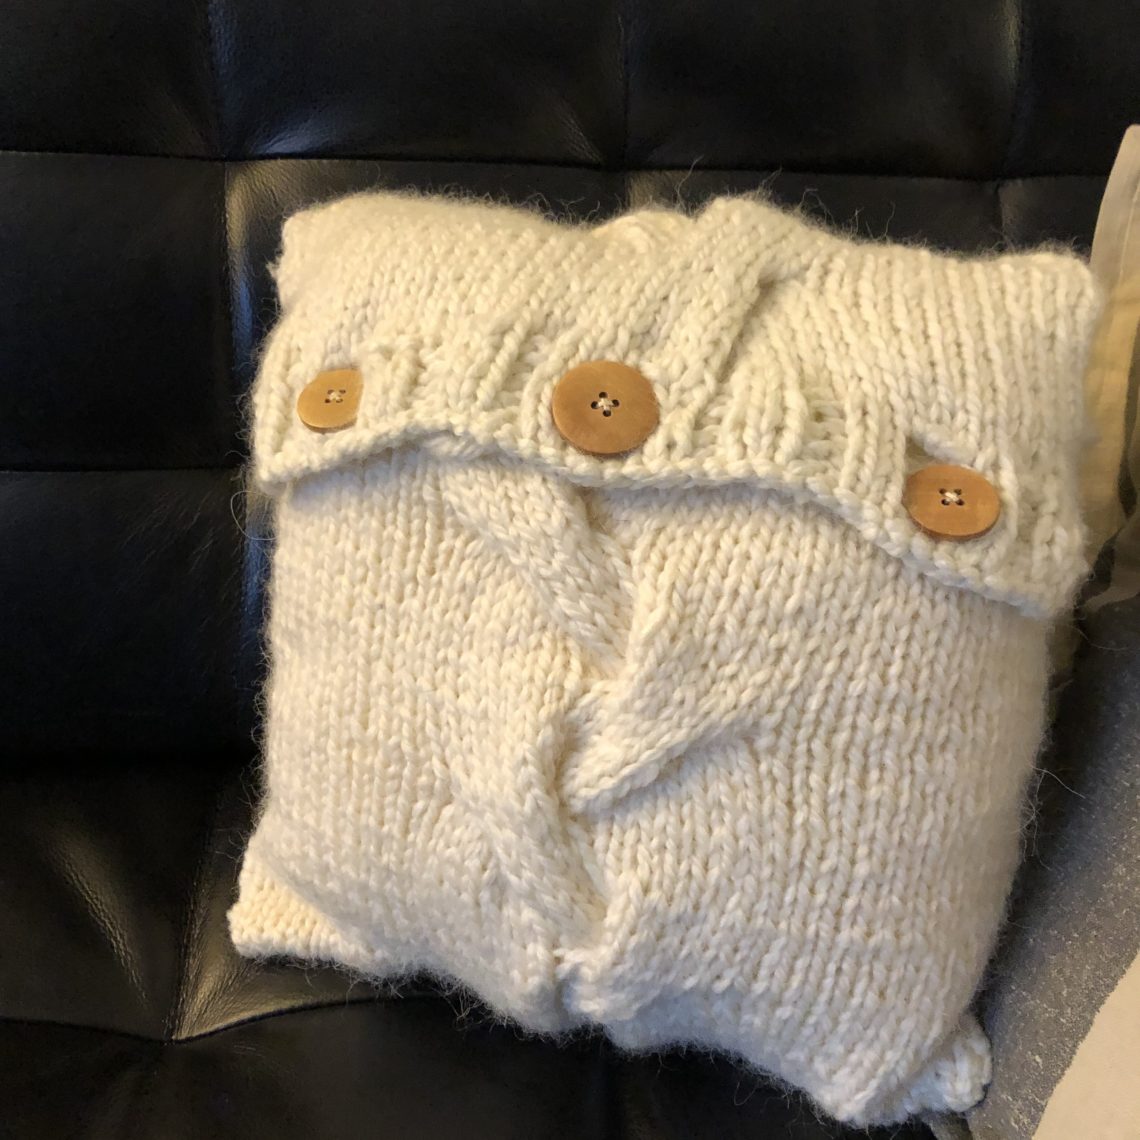
These pillowcases are 13 inches by 13 inches. In this post I’ve given both the pattern I’ve made for this size pillow and describe the process so that you can replicate this or create something similar for the pillows that you have in your home already.
How to Design Your Pillowcases
First, measure your pillow. Once you have this, grab your yarn and needles. You’ll need to knit a swatch to get your gauge. Your swatch should include any elements you’d like to have in your pillow.
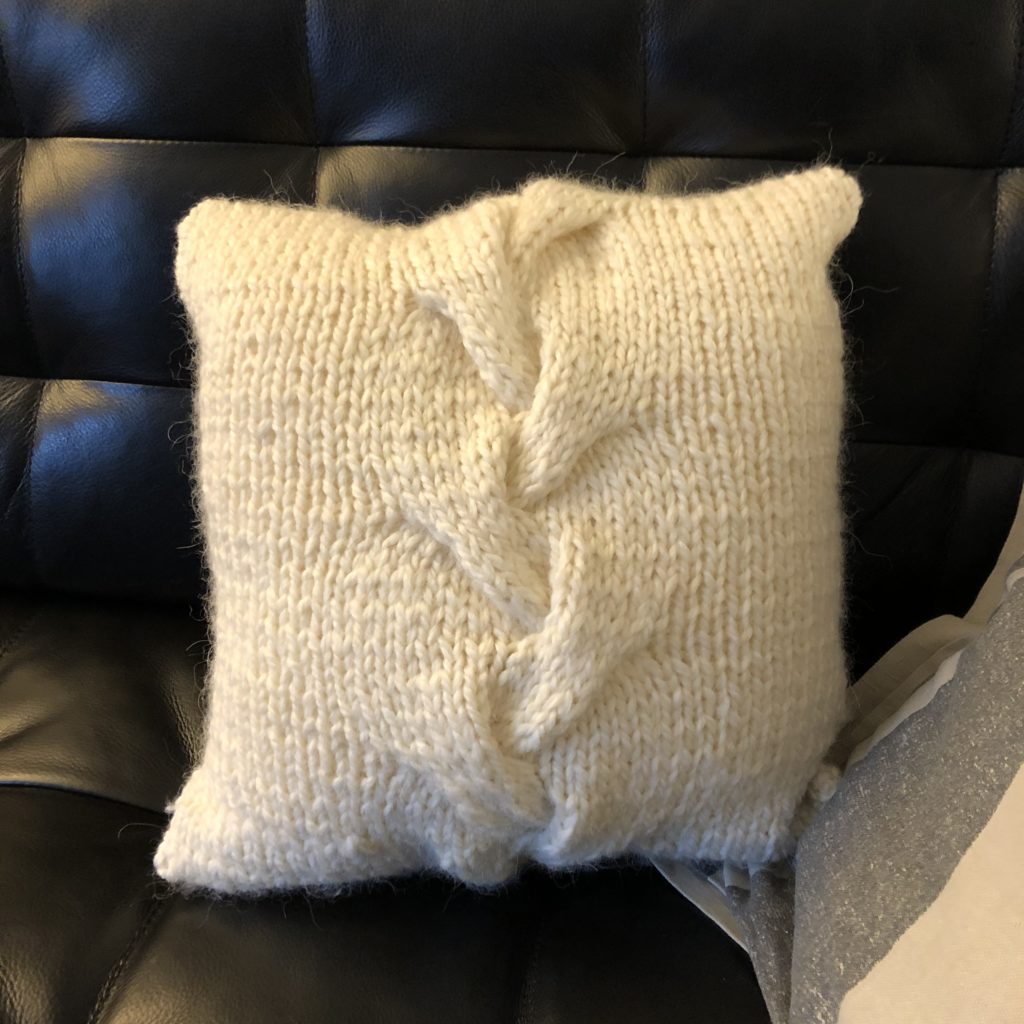
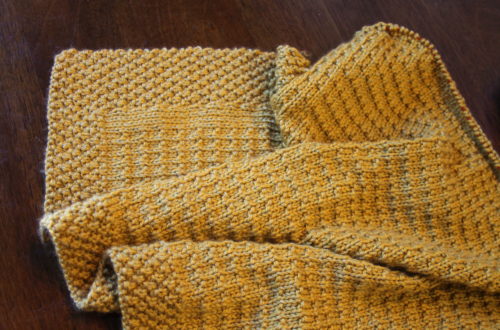
For example, in this pillowcase, I’ve used stockinette stitch and a cable. To figure out how wide the cable would be and the number of stitches I’d need on either side, I needed to test it out.
Then you can start writing your pattern. In this case, you’ll work the pattern in one long strip, just like you’d knit a scarf. Then you’ll fold the ends over on themselves and sew up the edges, creating an envelope so you can get the pillow into it.
You can choose to sew the ends of the pillow together too but this will inhibit you from taking the pillowcase off to wash it. The choice is up to you. I’d consider a provisional cast on or sewing the ends together on either edge of the pillow to hide the seam.
The Pillowcase Pattern with a Chunky Braided Cable
What you’ll need to to knit the pillowcase
Yarn: Buttercreame Luxe Craft Yarn Alpaca Solid in Cream. You’ll need about 1.5 skeins. Find it here.
Needles: US size 10 needles. You could use straight needles for this project. I’ve chosen to use my KnitPicks interchangeable circular needles because they are more comfortable for me personally. You’ll also need a cable needle or DPN in a similar size.
The braided pillowcase pattern:
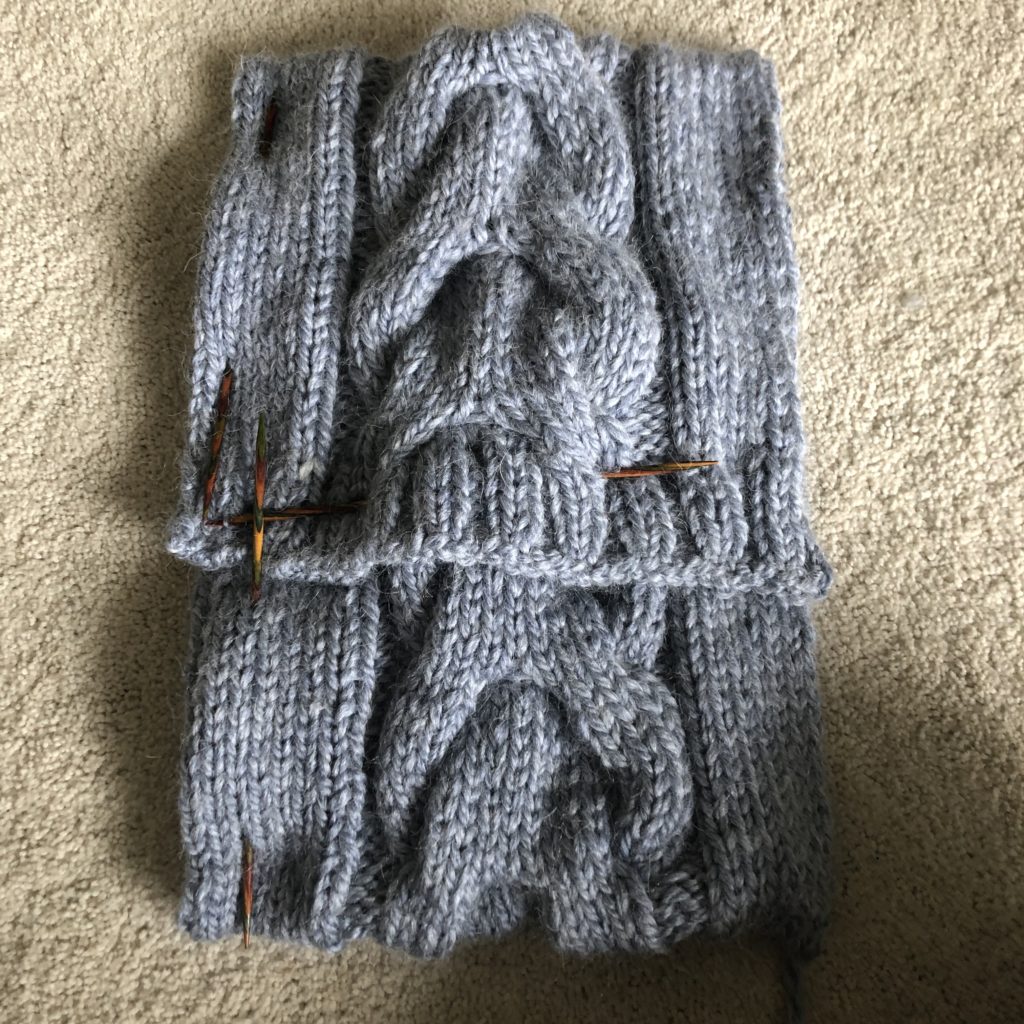
Cast on: 42 stitches.
Set Up rows:
Row 1: Knit all stitches
Row 2: Purl all stitches
Repeat these two rows until you’ve worked a total of 7 rows.
Row 1: K12, C3F, K to end of the row
Row 2 and all even rows: Purl all stitches
Row 3, 5, and 7: Knit all stitches
Row 9: K18, C3B, K to end of the row
Row 11, 13, and 15: Purl all stitches
Repeat these rows until your work measures about 33 inches.
Finishing the Pillowcase:
Row 1: K8, (K2, Bind off 1 stitch, K1, Bind off 1 stitch), K9 (K2, Bind off 1 stitch, K1, Bind off 1 stitch), K9, (K2, Bind off 1 stitch, K1, Bind off 1 stitch), K7
Row 2: *P2, K2* Repeat 2 times, Cast On 2 Stitches, *K2, P2* Repeat 5 times, K2, Cast On 2 Stitches, *K2, P2* Repeat 5 times, K2, Cast On 2 Stitches, *K2, P2* Repeat 2 times.
Row 3: *P2, K2* Repeat to end of row
Row 4: *K2, P2* Repeat to end of row
Repeat rows 3 and 4 at least 2 more times. Then Bind Off your stitches using a sewn bind off method to preserve the ribbing.
Sewing the Sides of the Pillow Case:
Grab your pillow for this part. Lay your knitting flat (it’s okay if the edges curl for this part). Lay your pillow in the middle of your knitting and wrap the knitting around the pillow. Adjust the position of the pillow until the edges overlap as you’d like.
Slip the pillow out. Using DPNs or pins, pin the two sides of your knitting together to make sewing easier.
Next take your tapestry needle and some spare yarn. starting from the bottom of the pillowcase. Sew up the side. When you get to the part where the edges overlap. Allow the edge of the top to remain free and continue sewing up the edge of the pillow. Weave in ends.
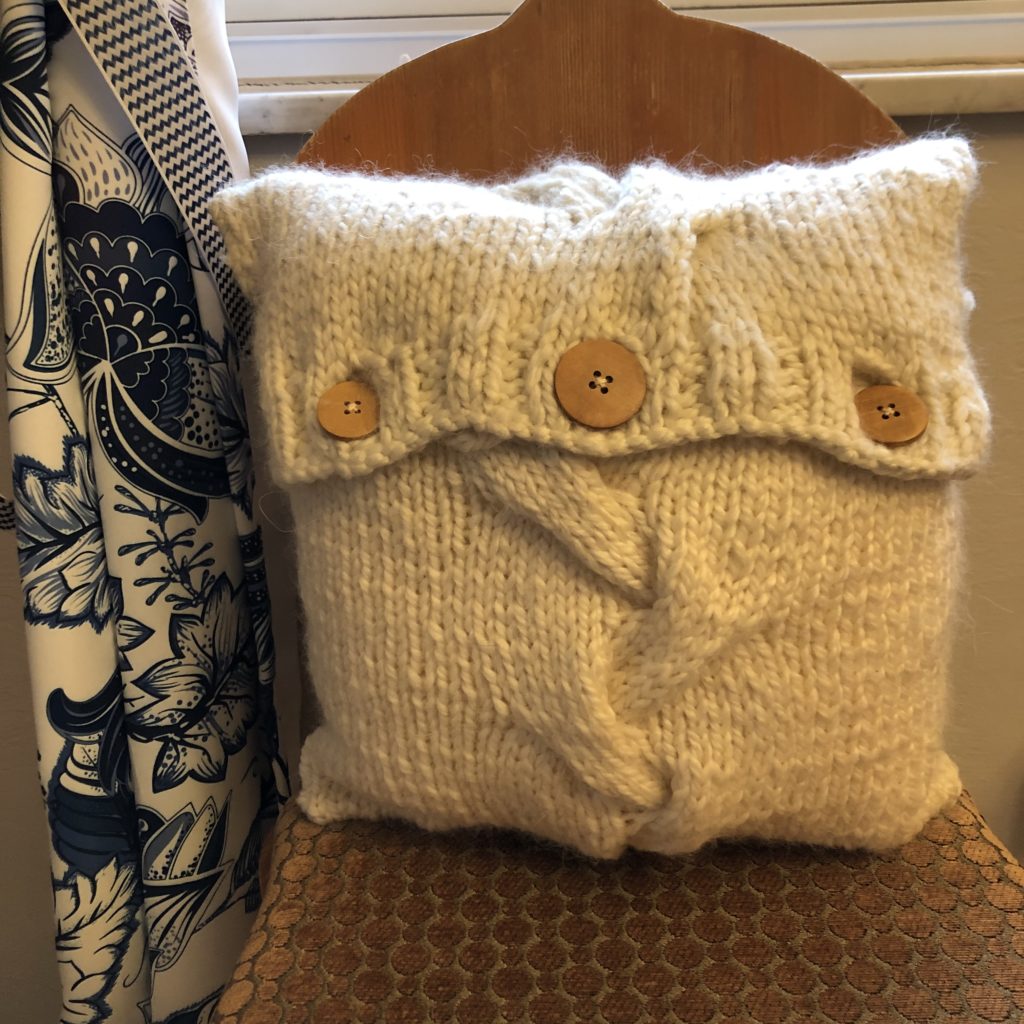
Add your favorite buttons and you’ve finished your pillowcase!
Why Do I love Knitted Pillowcases?
When I was making these patterns, I had a feeling I was going to like them. I wasn’t prepared for just how much I would love them. The chunky yarn worked really well. I’m really loving how the thickness of the yarn adds to the “soft” look and feel of the pillowcases. The buttons keep this balanced with the wooden texture.
These home decor knitting patterns look great, but they’re also practical. Just like when I designed the knitted hanging basket for my bathroom, I wanted these to be something that we could really use. One of the awesome things about knitting is that it is so tactile.
With the acrylic yarn, these can be easily removed and thrown into the washing machine to keep them looking fabulous. This is even more important now that we have a baby and a dog.


2 Comments
Karen
This is great, Maggie, thanks!!
Maggie
You’re quite welcome! I’ve got another one in the works with a different cable pattern.