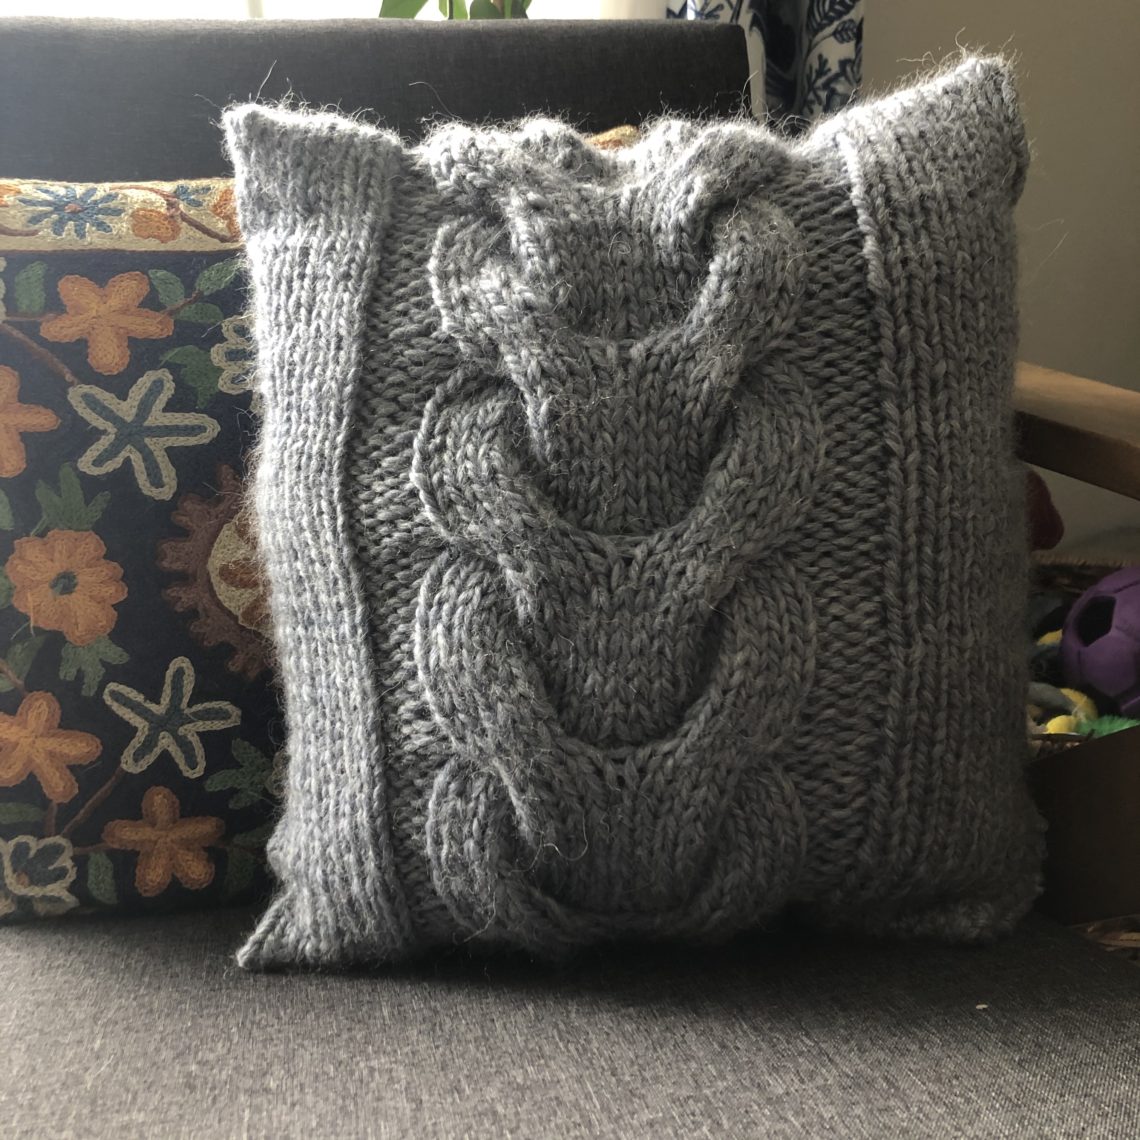
Chunky Cable Pillowcase Knitting Pattern
Knit this pattern for the pillows in your home!
The quarantine has been an uncomfortable time for many. To try to help (and to knit through some patterns that have been rattling around in my head for some time now), I’ve been publishing some free patterns that are easy to knit. This Chunky Cable Pillowcase is just one of them.

Here is a similar pattern with a braided cable, also free!
Both of these patterns use chunky or bulky yarn. They knit up over about a day or two depending on your speed. This makes them quick wins, which we can all use right about now.
What you need to knit this chunky cable pillowcase pattern:
Yarn:
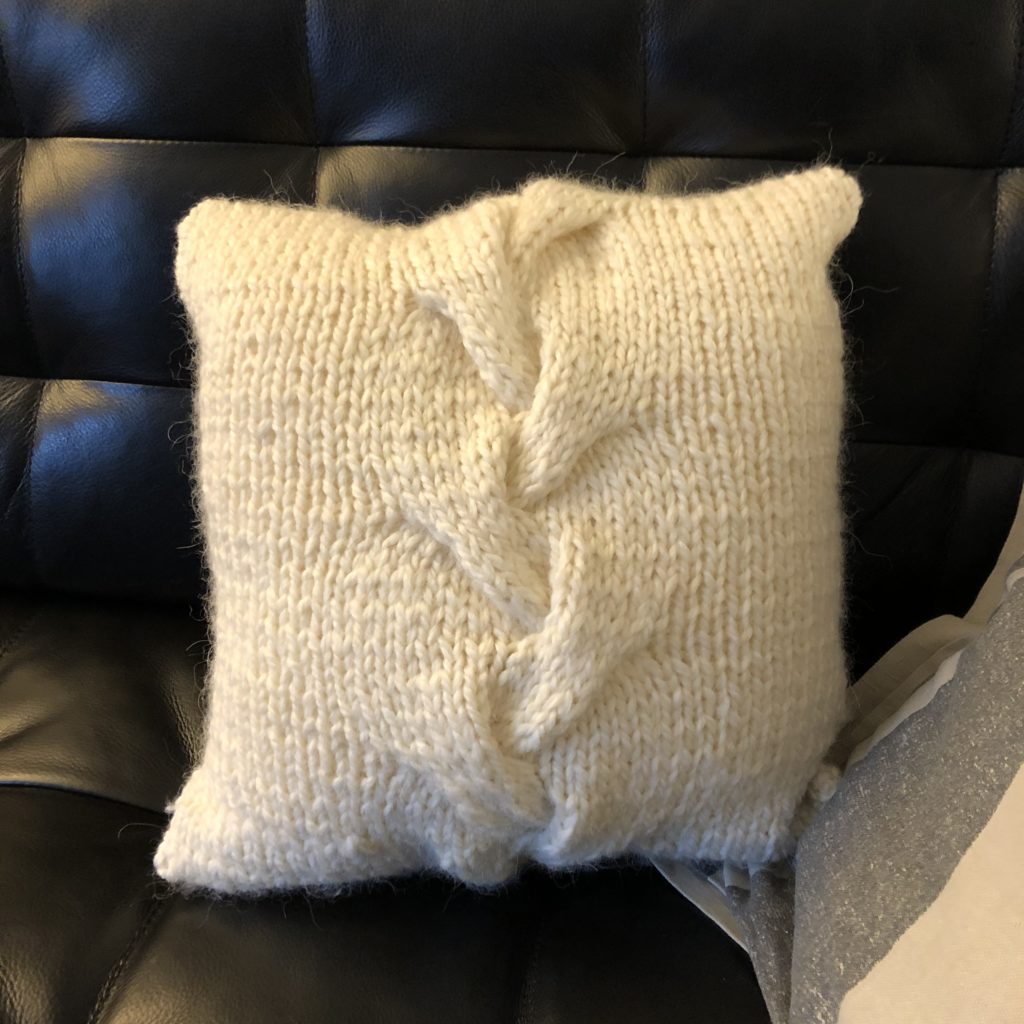
I’ve had some Buttercream Luxe yarn laying around for quite some time. Initially, I was going to make some hats out of it but I just never quite saw the pattern in my head. When I rediscovered these spare pillows, it was meant to be. I had to knit the Chunky Cable Pillowcase.
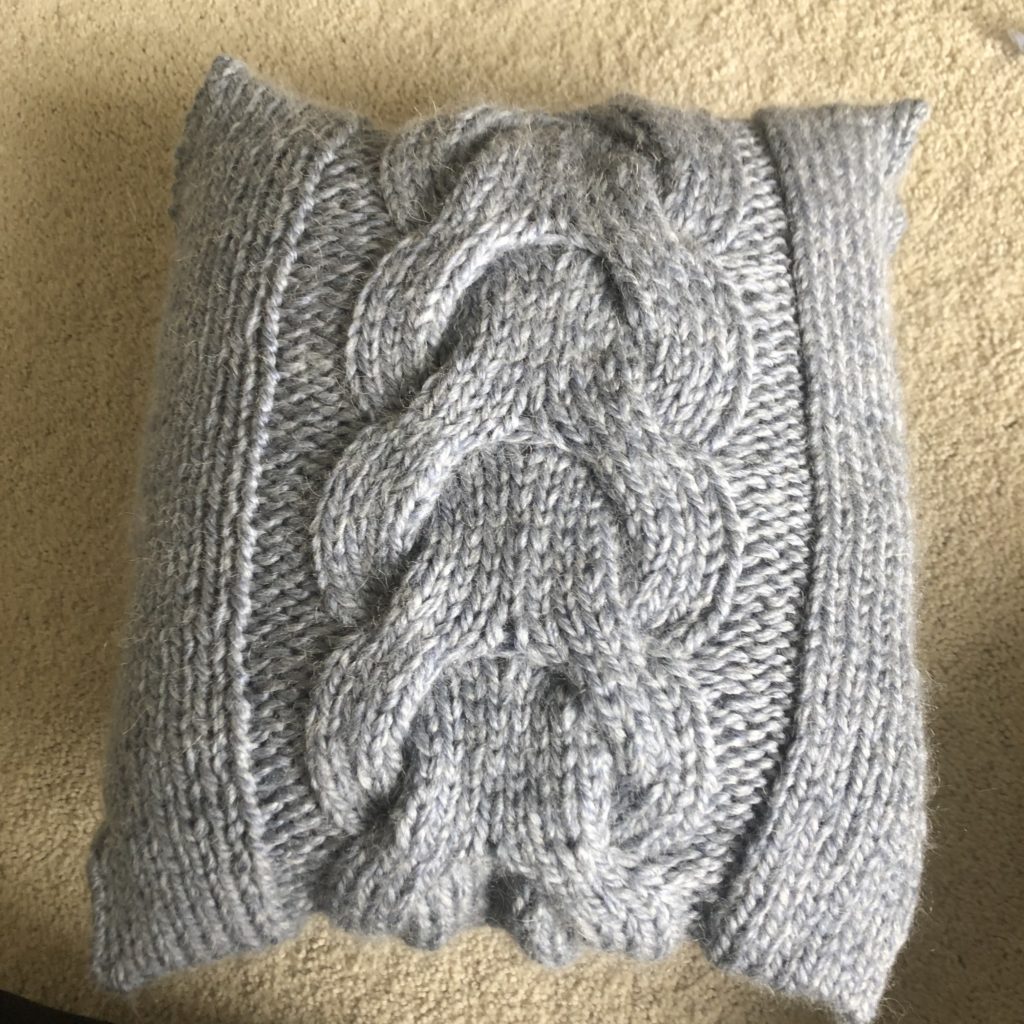
This yarn is an alpaca and acrylic blend. It does shed a bit so I plan to wash these before I actually use them as pillows. Get the yarn here from Joann Fabrics. This shade is Charcoal. This 13 inch by 13 inch pillow required 1.5 skeins.
Needles:
The yarn calls for larger needles, but I selected a US Size 10 circular needle. You can use straights for this project for sure. It all depends on what you prefer to knit with or have on hand in this size.
You’ll also need a tool to work the cables. Personally, I like to use a Double Pointed Needle (DPN) in a similar size. If you don’t have the exact size on hand, don’t sweat it!
Also, you’ll need a tapestry needle and a sewing needle to finish the pillowcase and make it form its “shape”.
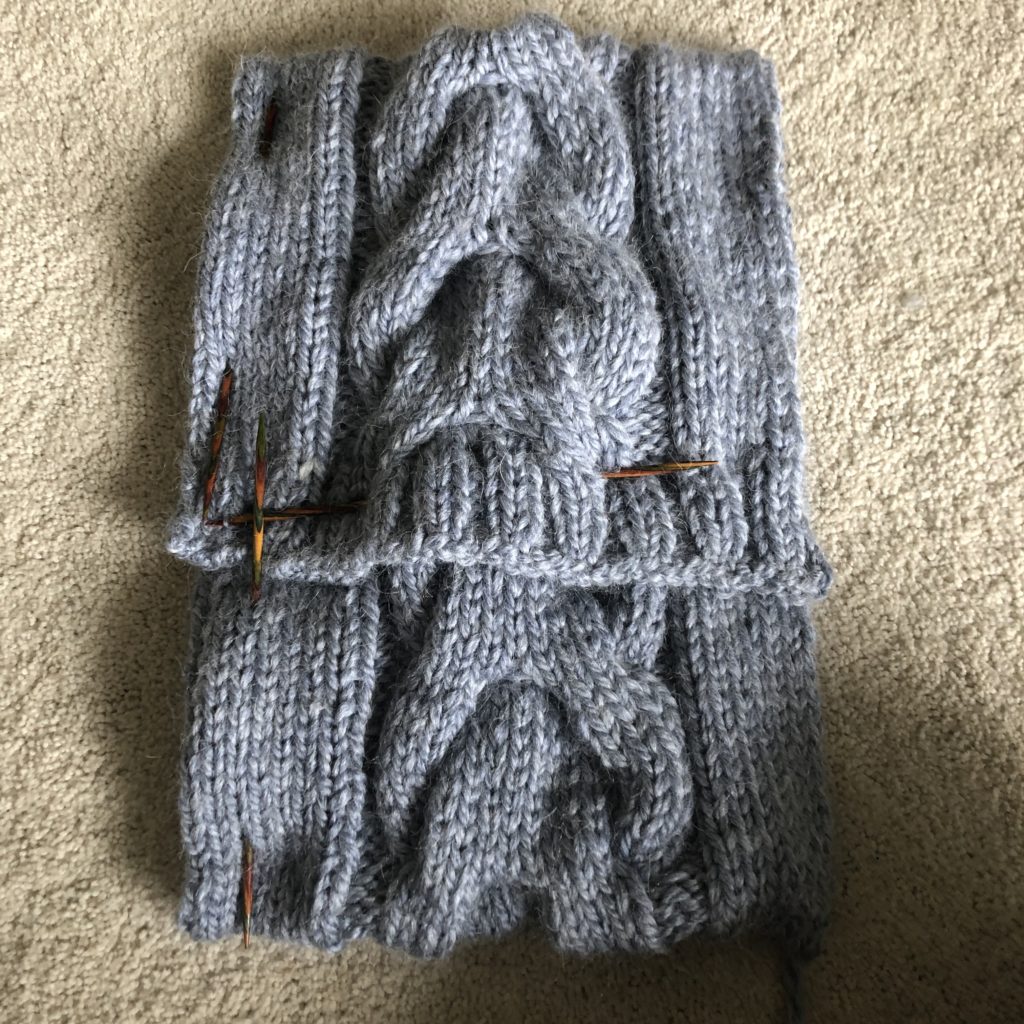
Extra needles: I used spare DPNs to pin my knitting together and hold it in place as you sew the sides together. This was easier than using pins or clips because the layers of chunky knitting made it a bit bulkier to work with.
Oh and some buttons. Don’t forget the buttons and a bit of thread!

How to knit the for a different size pillow:
This Chunky Cable Pillowcase pattern is pretty easy to design. You just need to gather your materials and knit a quick swatch to get a gauge. I’ve used stockinette stitch on either side of the cable to make it really easy to adjust the size of the pattern but you could also adjust the number of stitches in the cable if you need to.
Gauge:
If you go by my pattern below, you’ll really just need to gauge how many stitches make up an inch of stockinette stitch, and then how wide your cable ends up being. I’d start with 10 stitches in stockinette and the cable for your swatch. This will give you the measurement for both.
Measure your pillow. If your pillow is 15 inches across: take the 15 and subtract the width of the cable. Then divide this number by 2. This will tell you how many inches on either side you’ll need to work in stockinette. If you’ve knit stockinette in your swatch, you can easily gauge how many stitches you need to make one inch and then you can multiply it by that final number you got.
Cast on that final number of stitches (the number for either side of the cable, plus the 26 stitches for the purl breaks and cable). And begin working the pattern below.
How to determine the length of your knitting:
Take a ribbon tape measure and wrap it around the pillow to determine the necessary length you need to knit. If you don’t have a ribbon tape measure, take a bit of string or spare yarn and wrap that around the pillow. Cut or mark the end of the knitting and then you can straighten it out and use a traditional ruler to measure the length.
Follow the instructions for the Bind Off method and for sewing the pattern together below.
The Chunky Cable Pillowcase Pattern:
Begin Pattern:
Note Cable instructions:
C5F: Cable 5 stitches to the front, Knit 5 stitches. Then Knit 5 from Cable needle.
C5B: Cable 5 stitches to the back, Knit 5 stitches. Then Knit 5 from Cable needle.
Cast on: 42 stitches
Set up rows:
Row 1: P8, K3, P20, K3, P8
Row 2: K8, P3, K20, P3, K8
Repeat rows 1 and 2 until you have worked 11 rows in total.
The Pattern:
Row 1: K8, P3, C5F, C5B, P3, K8
Rows 2: P8, K3, P20, K3, P8
Row 3: K8, P3, K20, P3, K8
To work rows 4-12: Alternate rows 1 and 2.
Repeat this section until you work measures about 33 inches (or your desired length).
Finishing the Pillowcase:
Button Hole Row 1: K8, (K2, Bind off 1 stitch, K1, Bind off 1 stitch), K9, (K2, Bind off 1 stitch, K1, Bind off 1 stitch), K9, (K2, Bind off 1 stitch, K1, Bind off 1 stitch), K7
Button Hole Row 2: K8, Cast On 2 stitches, K10, K8, Cast On 2 stitches, K10, K8, Cast On 2 stitches, K8
Ribbing Row 1: *P2, K2* Repeat to end of the row
Ribbing Row 2: *K2, P2* Repeat to end of the row
Repeat ribbing rows 1 and 2 for six rows total.
Bind off: Use sewn in bind off but keep your stitches tighter to maintain the shape of the pillow.
Finishing Your Pillowcase:
Grab your pillow, your knitting, and a few extra dpns, pins, or knitting clips. Wrap your knitting around your pillow, and line it up in our desired fashion. The ends will curl due to the stockinette and that’s okay for now. Using your tool of choice, pin the two pieces together about where you made the button holes. Make sure the edge with the ribbing/button holes is on top.
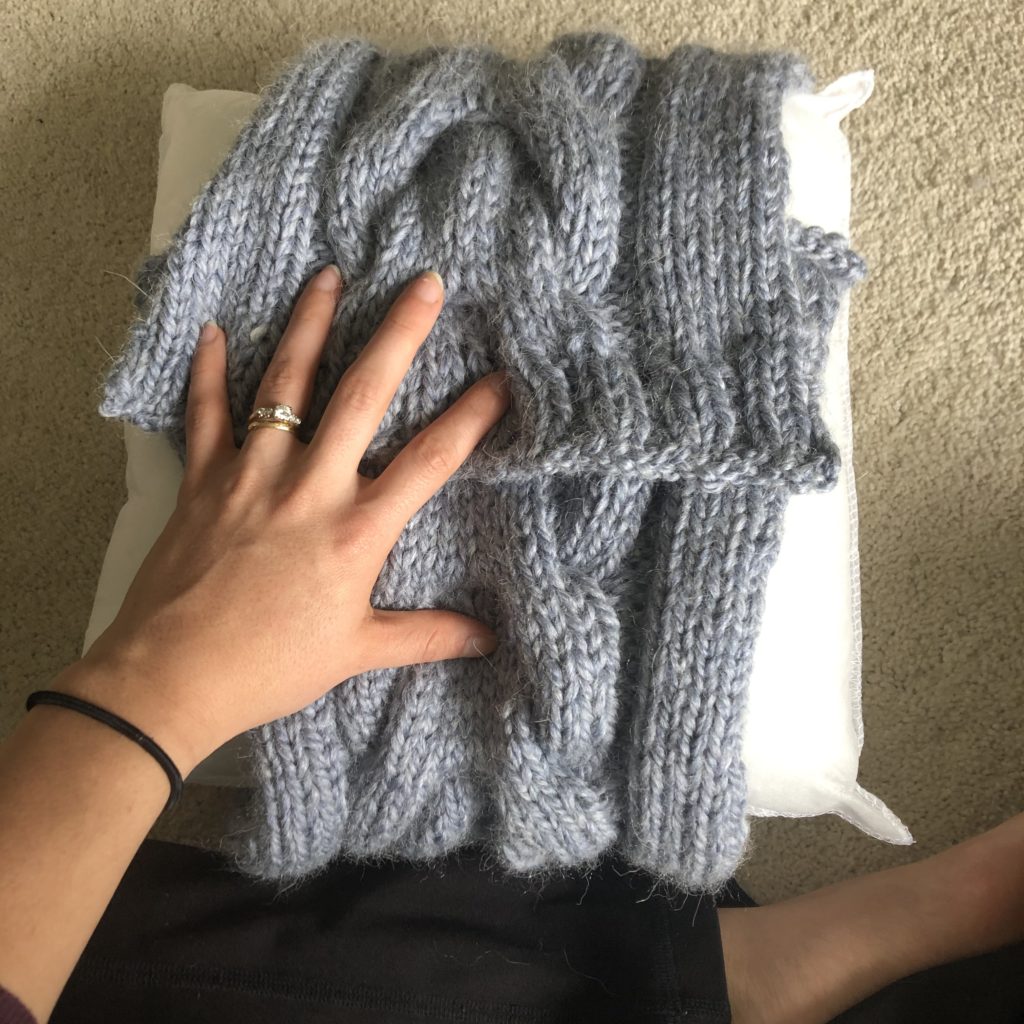
Now you can slide the pillow out. Uncurling the edges, pin these together too. I used three DPNs total (one near the button holes, and two for the side. I just pinned and sewed one side at a time).
Cut a piece of your spare yarn, at least double the length of the section you need to knit. Thread your tapestry needle, and sew up the side of the pillow. I left the edge of the top flap free to make inserting the pillow easier. Repeat the process on the opposite side. Make sure to weave in your ends.
Buttons: Line your preferred buttons up with your button holes. Using a needle and thread, sew these buttons to the interior flap of the pillow.
Insert your pillow, button the buttons and you’re done!