Bathroom Baskets
A free knitting pattern for your home
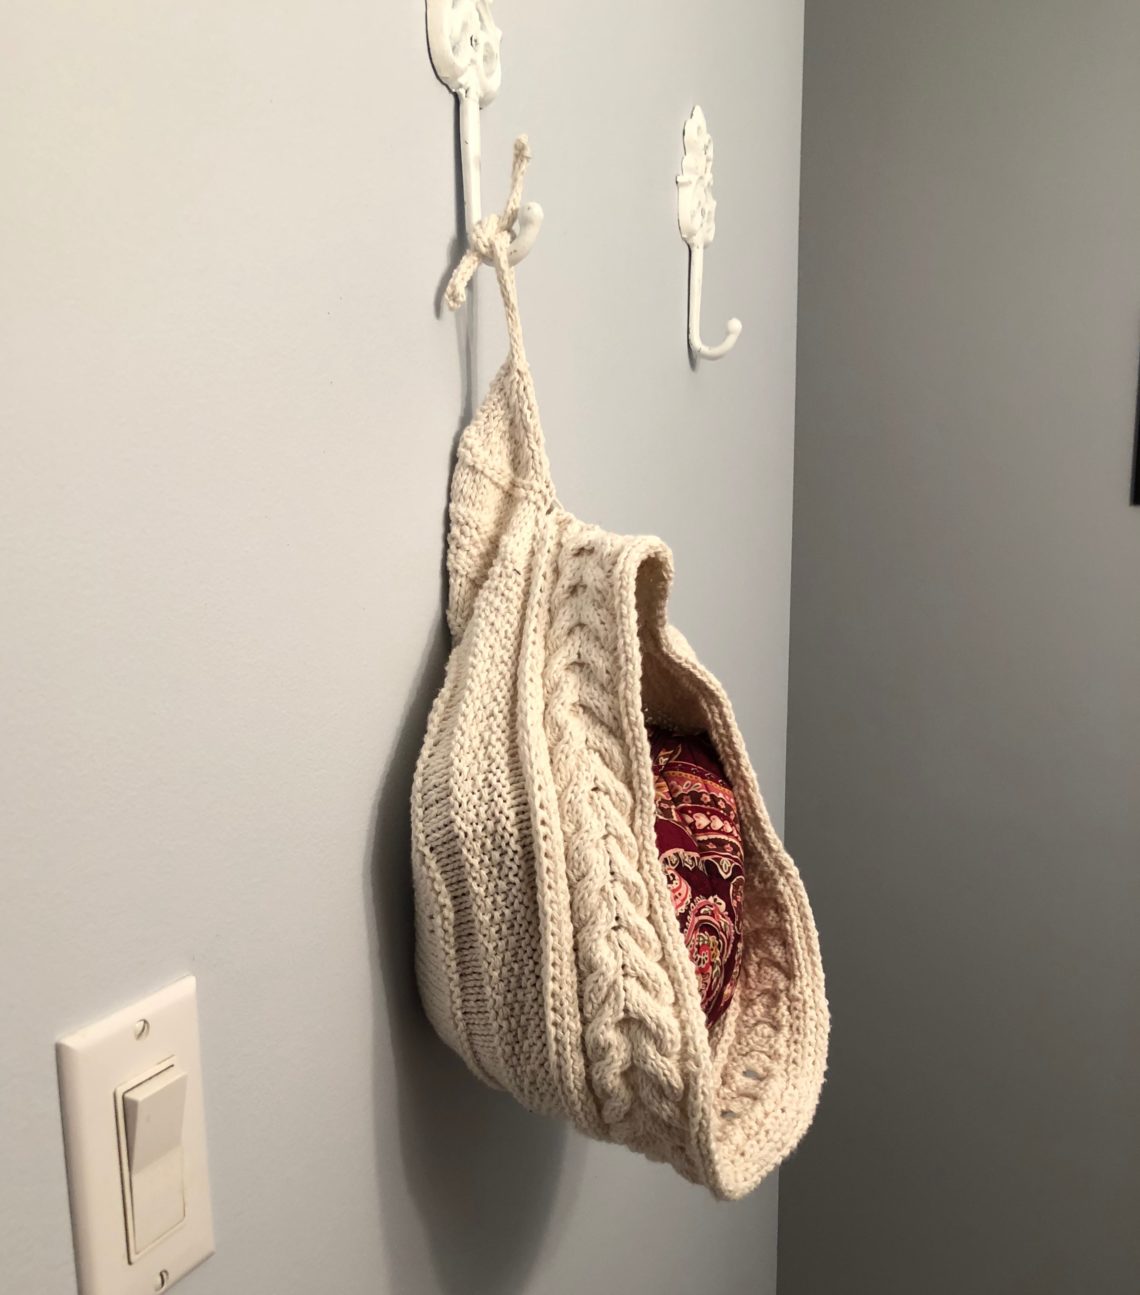
We have a tiny half bathroom off of our bedroom as our master in our 1960’s ranch home. In this small space, we’re short on storage. While the other/main bathroom of the house is much bigger and has a lot more storage, there are things that I would like to have close at had. We found an over the toilet medicine cabinet and painted it with a fresh coat of white, which was awesome. But I found these adorable hooks at JoAnn Fabrics and wanted to use them in the bathroom to break up a bit of the blue, and thought a hanging basket would add a soft touch. In this post, I’m offering the basket knitting pattern for free.
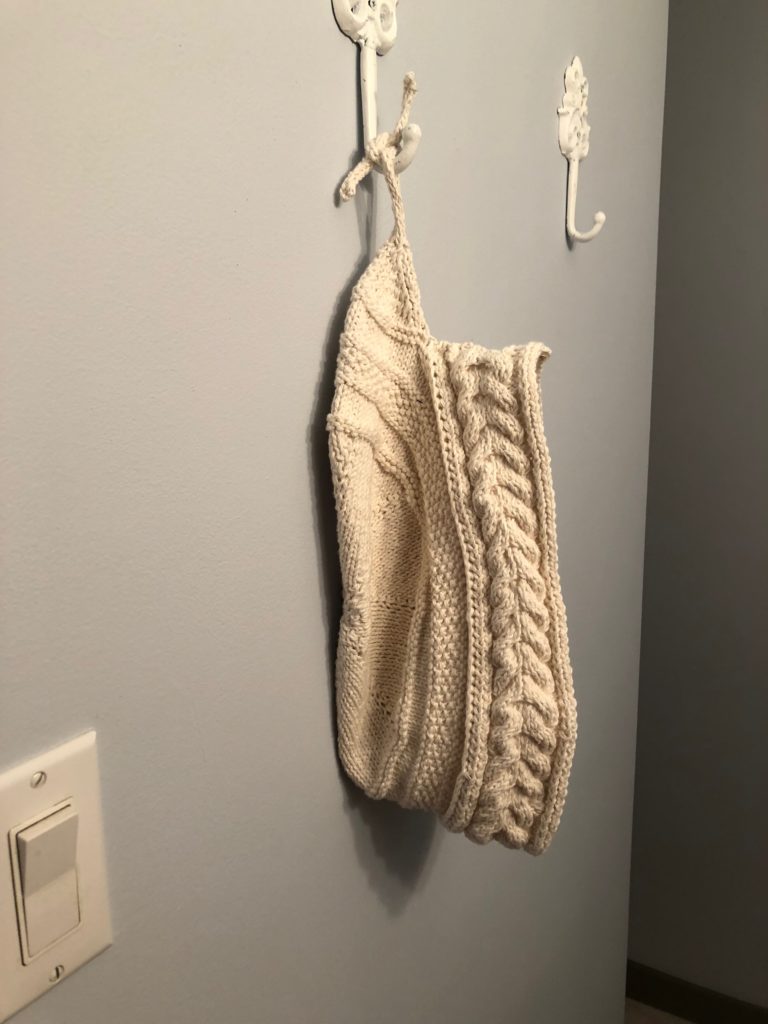
With the size of the bathroom being so limited. I needed a shallow basket, so the walls are a bit short. You can easily edit this pattern by adding some additional sections to raise the walls a bit higher. I also thought about sewing a piece of yarn into the walls at certain points and tightening it up a bit to encourage the basket to hold it’s shape a bit. I still haven’t made my decision on that one. For now, it’s been pulled and prodded into the perfect little shape. I’ll mention another option for the knitted border a bit further on as well.
Which is how I came up with the grand plans to knit my own baskets using cotton Dishie yarn. I started off researching some other baskets, and found that there are mostly crochet patterns available, but a limited amount of knitted patterns. In my determined knitter voice I said to myself “I’ll fix this!” and create my own basket knitting pattern. Little did I know that I would be winging it the entire time and making snap decisions on the fly. BUT, with all of that being said, my husband and I are really happy with the sweet little basket now hanging in our bathroom. I plan to knit a second basket, but for the moment I’m oscillating between making an identical match, or trying my hand at a different pattern (closer to what I originally had in mind).
Yarn: Sugar ‘n Cream Cotton Yarn from Lily (you can find it at Joann Fabrics) in medium or number 4.
Gauge:
Abbreviations:
CO: Cast On
STS: Stitches
K: Knit
KFB: Knit front and back
P: Purl
P2Tog: Purl two stitches together as one
P3Tog: Purl three stitches together as one
Sl1: Slip one stitch (knit-wise)
Care Instructions: Machine washable, tumble dry (or whatever the skein label normally says.) I don’t plan on needing to wash this pattern that much, and didn’t bother to even block it before hanging it. Since it’s going to be dedicated storage for things that won’t really cause it to get dirty. But since it’s made from cotton, it’s a durable and washable material. This means that if you spill your makeup, or have a mishap with a tube of toothpaste, or whatever else you might store in your basket knitting pattern when it’s complete, you’ll be able to wash it worry free.
Needle: Size US 5 DPNs and cable needle, Tapestry Needle
Begin Pattern:
CO: 4 Stitches over four DPNs
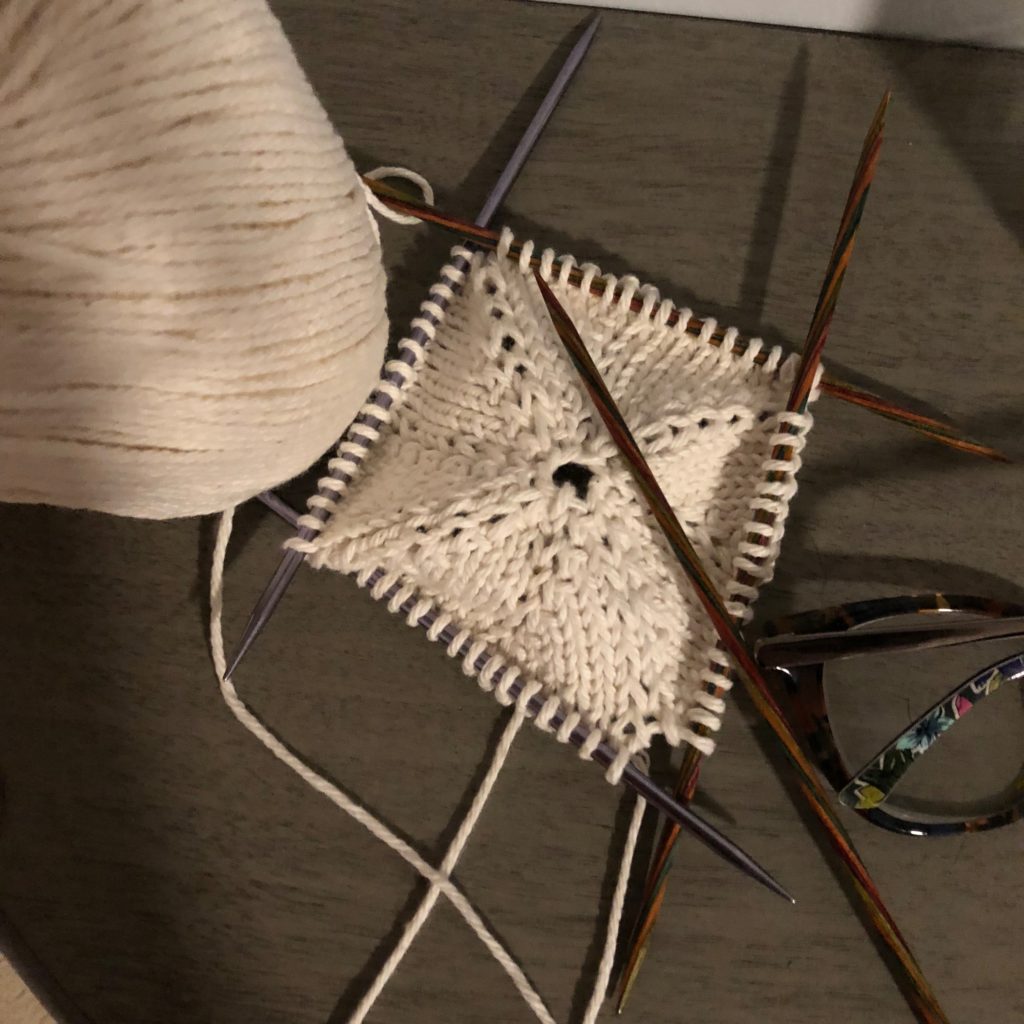
Round 1: KFB into all stitches (16 STS)
Round 2: Knit all stitches
Round 3: *KFB, K1* Repeat until end of round
Round 4: Knit all stitches
Round 5: *KFB, K2* Repeat until end of round
Round 6: Knit all stitches
Round 7: *KFB, K3* Repeat until end of round
Round 8: Knit all stitches
Round 9: *KFB, K4* Repeat until end of round (48 STS)
Round 10: Knit all stitches
Round 11: *KFB, K5* Repeat until end of round
Round 12: Knit all stitches
Round 13: *KFB, K6* Repeat until end of round
Round 14: Knit all stitches
Continue this pattern until you are knitting 16 stitches in between each make KFB. You’ll want to switch from the DPNs to a circular needle at some point. I switches on the round where there are 11 stitches in between the increases.
Side Walls
Rounds 1 and 2: Purl All Stitches
Rounds 3 – 7: Knit all stitches
Round 8 and 9: Purl All Stitches
Rounds 10 – 14: Work seed stitch (alternating knits and purls)
Round 15 and 16: Purl
Rounds 17 – 21: Knit All Stitches
Rounds 22 and 23: Purl All Stitches
Knit Border:
Note: You may want or need a few (3) DPNS. Others may choose to use your circular needle to work these rows of the basket knitting pattern back and forth, but to save counting and make it easier, I opted for three Double pointed needles.
CO: 22 Stitches
Row 1: Sl1, K2, P2, K12, P2, K2, K2Tog TB
Row 2: Sl1, P2, K2, P12, K2, P3
Row 3: Sl1, K2, P2, C6F, C6B, P2, K2, K2Tog TB
Row 4: Sl1, P2, K2, P12, K2, P3
Row 5: Sl1, K2, P2, K12, P2, K2, K2Tog TB
Row 6: Sl1, P2, K2, P12, K2, P3
Row 7: Sl1, K2, P2, K12, P2, K2, K2Tog TB
Row 8: Sl1, P2, K2, P12, K2, P3
Repeat rows 3-8 until you have knit the border, until there are 28 stitches left. You’re almost done with the basket knitting pattern! This was a point in the pattern that I definitely learned something. With knitting the border back and forth, there are two rows for every decreased stitch, which is great when you’re working on the border of a cardigan or shawl, but I needed the border to be stiffer, and straight in line with the walls of my basket. I should have started the border with needles that are a size or two smaller. But I had done about 90% of the border and really did not want to rip it out. So I improvised.
Join the two ends of the border in your preferred method. (I sewed them together, the live stitches to the cast on edge).
Place 14 stitches on one double pointed needle, and 14 on another.
You’ll work with one DPN first.
K14 STS
P2, P2Tog, P until last 4 sts, P2Tog, P2
K12 STS
P2, P2Tog, P until last 4 sts, P2Tog, P2
K10 STS
P2, P2Tog, P until last 4 sts, P2Tog, P2
K8 STS
P2, P2Tog, P until last 4 sts, P2Tog, P2
K6 Sts
P2, P2Tog, P2Tog, P2
K6
P2, P2Tog, Pq
K5 STS
P1, P3Tog, P1
Knit 30 rows of I-cord (knit but instead of turning the work, slide the stitches back to the other side of the DPN and knit them again.
Repeat for the second DPN.
Bind off.
Finishing Instructions: Use Tapestry needle to weave in the tails of yarn. Simply tie the ends together and hang your basket.
I hope you’ve found this basket knitting pattern easy to follow and fun to make! Please share photos of your work with me and I’ll be sure to share them on here, and on my social media platforms.


2 Comments
Karen Bachman
Thanks for the pattern!
Maggie
No problem! This was a fun/frustrating one so I hope the instructions are clear. Would love to know/see what you come up with 🙂