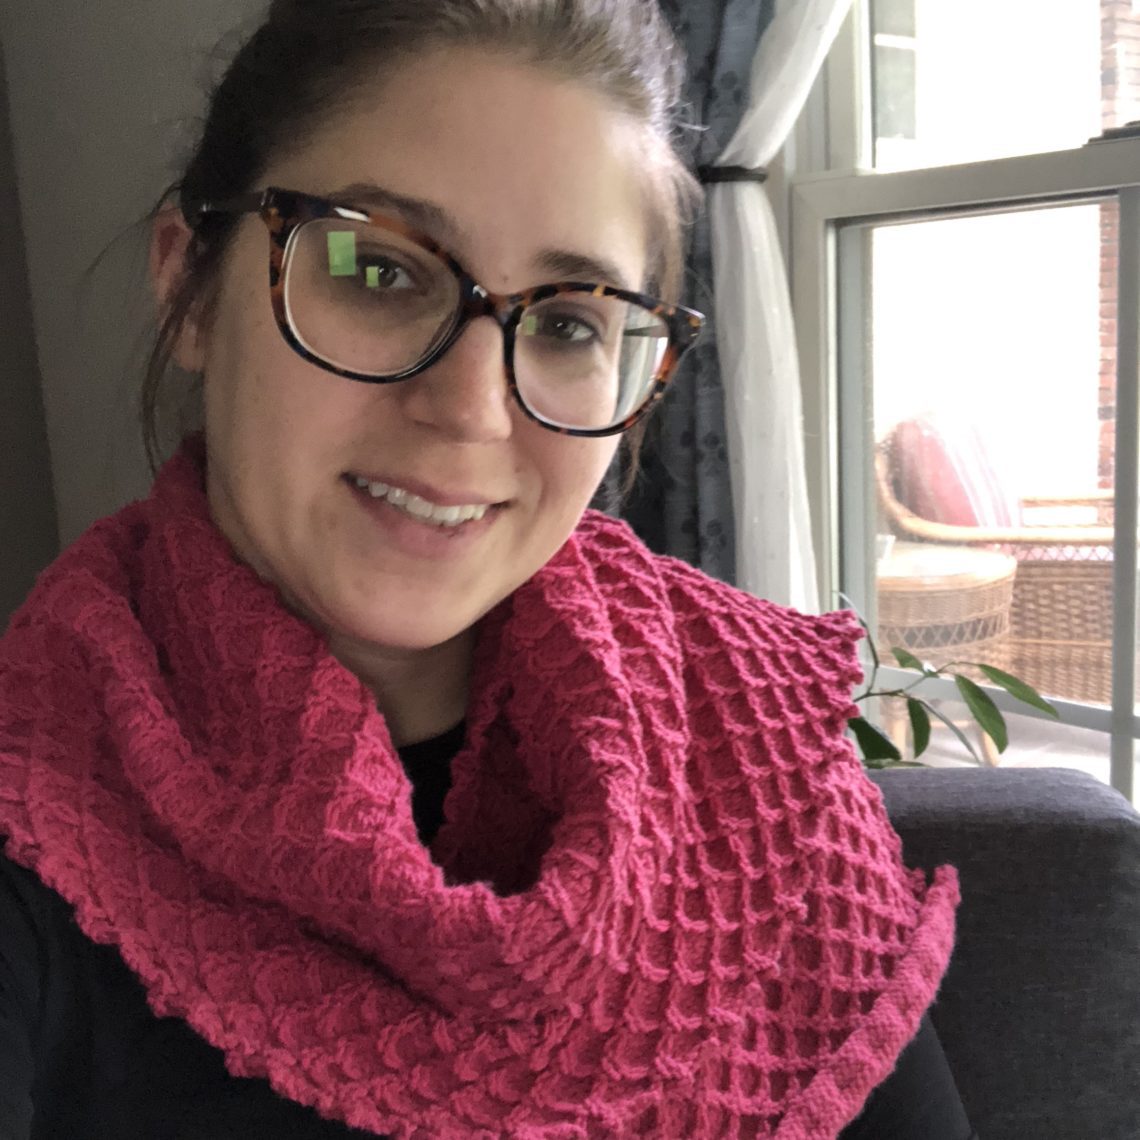
The Bees Knees Shawl
A soft and supple shawl using the diamond honeycomb stitch.
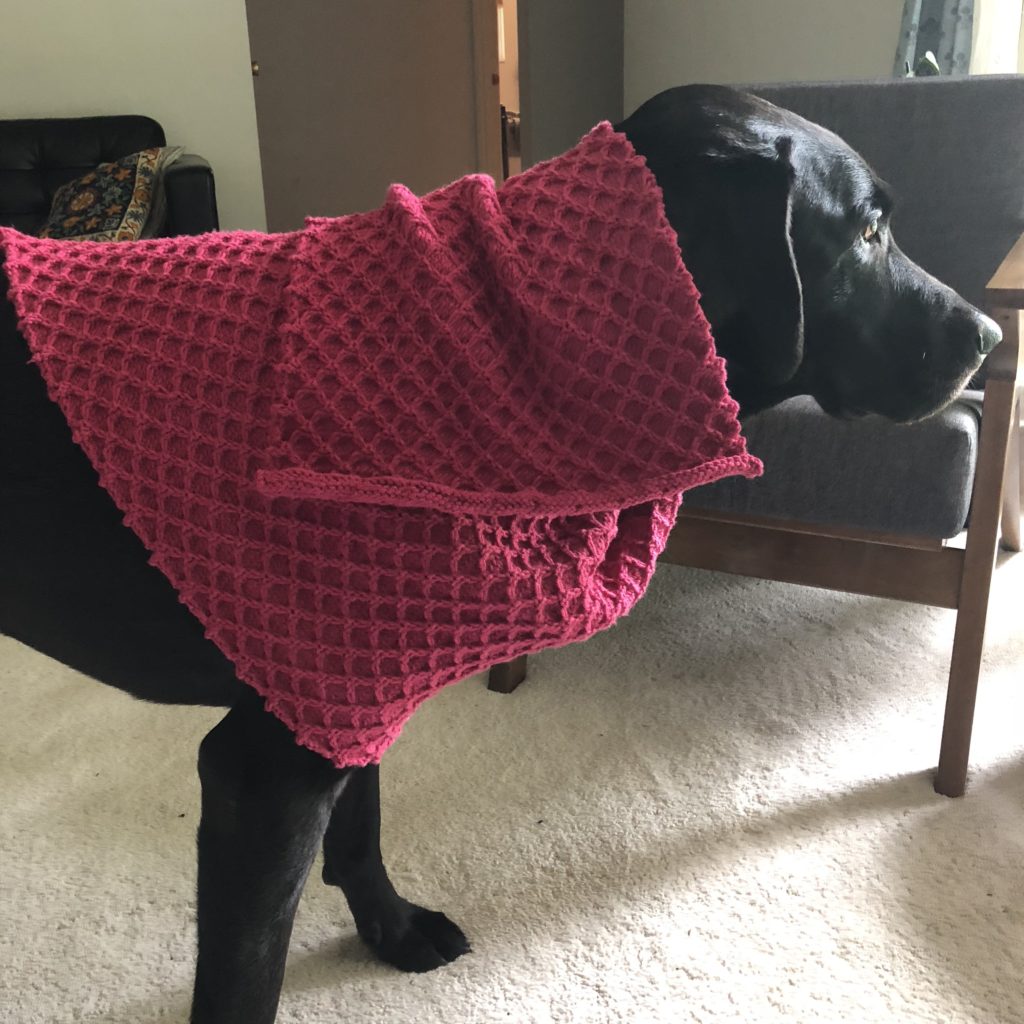
The Bees Knees Shawl is a soft and warm wrap perfect for a cool spring evening.
If you’ve not learned to knit under loose strands, this is a fun and easy pattern that will have you feeling confident in a new skill.
If you’ve already mastered the skill, it’s a fun pattern that is easy to whip up. Either way, it makes a great looking shawl – and a great gift.
There are two versions of the Bees Knees shawl in this pattern – both are quite simple.
One is for just the textured pattern of the shawl which is featured in the photos. The other version of the pattern is for a knitted border. The knitted border will make the shawl look a bit neater, and help it to lay flat in between blocking it. (This is great if you are gifting to a non-knitter and are worried about them taking care to lay it flat in order to dry it.)
Yarn for the Bees Knees Shawl:
I used Cleckheaton, Superfine Merino in Raspberry when it was available at JoAnns. (142 yards per skein) You’ll need between 568 – 852 yards depending on your desired length. I really like this yarn because it knits up well but it also is very easy to care for. You can machine wash on gentle or hand wash it, and use a short spin cycle to dry it or air dry it. The downside is that with the closure of Joanns you have to order it and it’s made in Australia. You can use a different super fine yarn as a substitute.
Needle: Size US 6 Circular or Straight Needle, Tapestry Needle
Note: For wider shawls and heavier knitted items I strongly prefer a circular needle as opposed to long straight needles. It’s easier on your arms.
Gauge: 20 STS X 30 rows = 4”X4”
Abbreviations:
CO: Cast On
STS: Stitches
K: Knit
P: Purl
S3 wyib: Slip three with yarn in Back. Move the yarn to the back of the work and slip 3 stitches.
S3 wyif: Slip three with yarn in Front. Move the yarn to the front of the work and slip 3 stitches.
K1 uls: Knit 1 under loose strands: move your right hand needle down below the loose strands, picking them up on your needle. Knit the next stitch, and then work that stitch under the loose strands, allowing them to fall off the right hand needle.
Notes: any slipped stitches in this pattern are purl-wise – inserting the needle from the right to left side of the stitch as if to purl it.
Care Instructions: Hand wash or Machine washable on gentle, spin cycle or air dry
Bees Knees Shawl Without Border:
CO: 71 Stitches
Row 1: K1, * S3 wyib, K3; rep from * to last 4 sts, S3 wyib, K1.
Row 2: P1, * S3 wyif, P3; rep from * to last 4 sts, S3 wyif, P1.
Row 3: Purl all stitches
Row 4: Knit all stitches
Row 5: Purl all stitches
Row 6: K2, * K1 uls, K5; repeat from * to last 3 sts, K1 uls, K2.
Row 7: K4, * S3 wyib, K3; rep from * to last st, K1.
Row 8: P4, * S3 wyif, P3; rep from * to last st, P1.
Row 9: Purl all stitches
Row 10: Knit all Stitches
Row 11: Purl all Stitches
Row 12: K5, * K1 uls, K5; repeat from * to end.
Repeat these rows until the shawl is your desired length.
Bees Knees Shawl with Border:
CO: 77 Stitches
Bottom Edge: knit six rows taking care to slip the first stitch of every row.
Begin Pattern:
Row 1: S1, K3, * S3 wyib, K3; rep from * to last 7 sts, S3 wyib, K4.
Row 2: S1, K2, P1, * S3 wyif, P3; rep from * to last 7 sts, S3 wyif, P1, K3.
Row 3: Purl all stitches
Row 4: Knit all stitches
Row 5: Purl all stitches
Row 6: S1, K4, * K1 uls, K5; repeat from * to last 6 sts, K1 uls, K5.
Row 7: S1, K7, * S3 wyib, K3; rep from * to last 4 sts, K4.
Row 8: S1, K2, P4, * S3 wyif, P3; rep from * to last 4 sts, P1, K3.
Row 9: Purl all stitches
Row 10: Knit all Stitches
Row 11: Purl all Stitches
Row 12: S1, K7, * K1 uls, K5; repeat from * to last 3 sts, K3.
Repeat these rows until work is just about your desired length, and then end with another six rows of knitting.
Finishing:
Bind off.
Use Tapestry needle to weave in the tails of yarn.
Note: When I finish a pattern, I like to soak or wash it and then block it. This can be super frustrating because it’s exciting to have finished something, but your project will look even better and have it’s “true shape” when you wear it.
Questions or edits? Please email me!