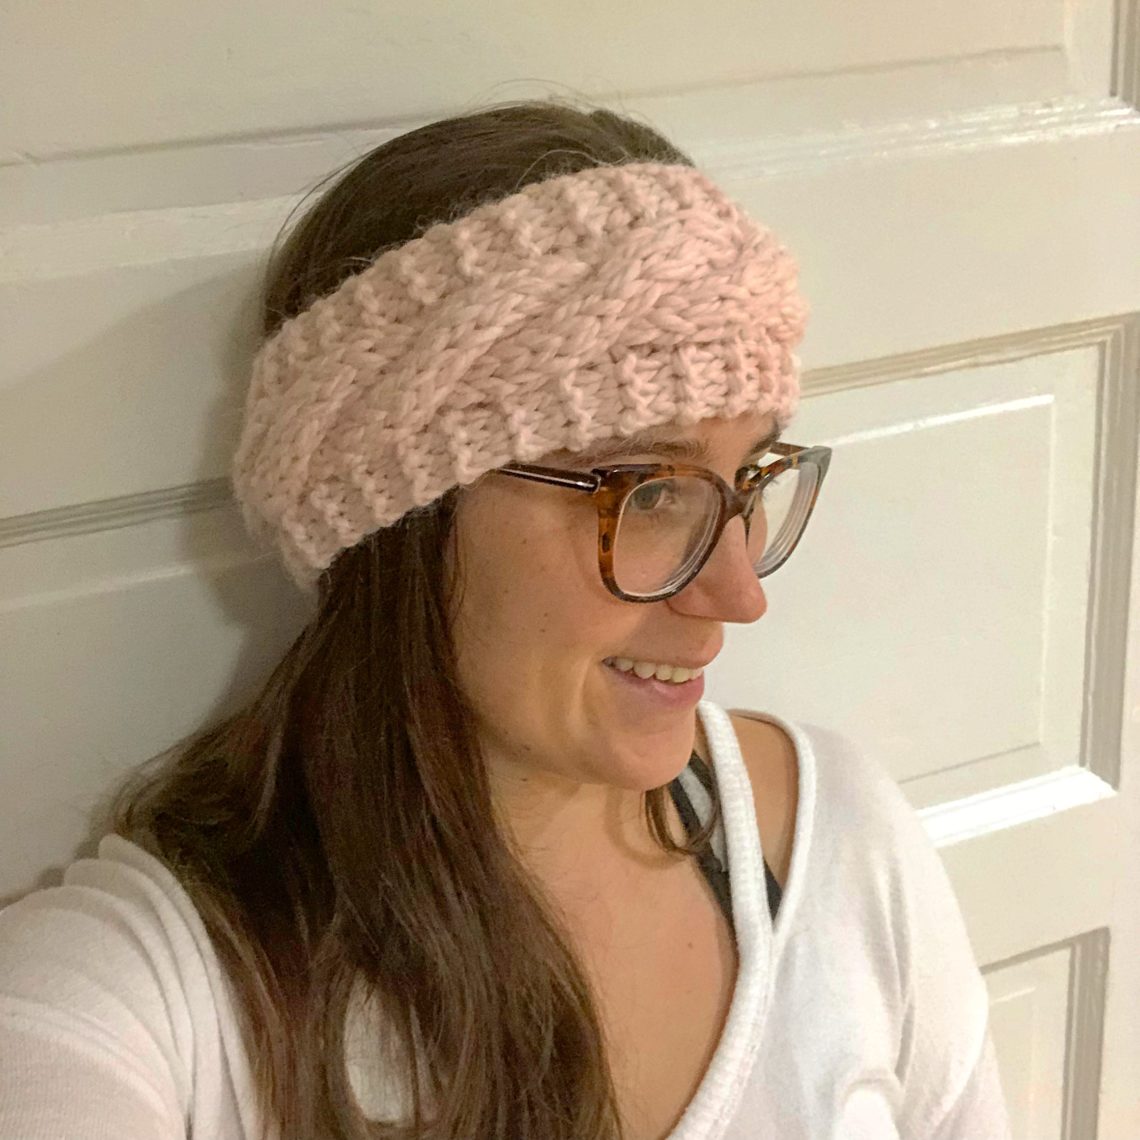
Chunky Cable Ear Warmer
A Free knitting pattern for a pretty yet functional cable ear warmer
Ear warmers are great patterns to knit – they’re fun, they’re fast, and they’re functional. All three of these benefits make them great for gifts. Every year before Christmas, I like to stock up on a few of these quick knits. This is the perfect return gift for that surprise surprise you didn’t know you were getting.
There are a few patterns floating around out there, both free and paid. I’m going to throw my towel into the ring and give you my favorite pattern.
Pattern Abbreviations:
K: Knit
P: Purl
C4F: Cable four stitches to the front
How to Knit the Chunky Cable Ear Warmer:
1. Find the perfect chunky yarn.
Chunky yarn makes this project knit up quickly. It’s also really popular right now. I had some pink lying around, so that’s what I’ve chosen for this pattern. They look great in any color though.
I’ve selected Buttercream’s Luxe Alpaca Solids.
2. Select your needle.
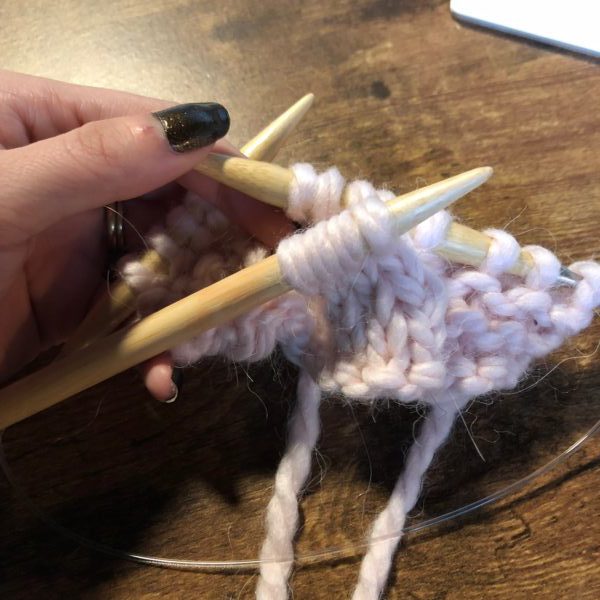
With chunky yarn, generally comes chunky needles. For this pattern, I’ve used a US size 13 or 9.0mm Bamboo needle. The brand on this one is Clover.
You’ll need either a circular needle or straight to knit. You’ll also need a cable needle of sorts. I generally use a DPN in the same size.
3. Cast On
Cast on a total 16 stitches. Feel free to use your method of choice. I prefer a long tail cast on.
Tip: Leave a size-able tail, to help make sewing the ends together at the end of the pattern easier.
4. Knit the Chunky Cable Ear Warmer!
Setup Rows:
Row 1: K3, P1, K8, P1, K3
Row 2: K4, P8, K4
Row 3: K3, P1, K8, P1, K3
Row 4: K4, P8, K4
Cable Pattern:
Row 1: K3, P1, C4F, P1, K3
Row 2: K4, P8, K4
Row 3: K3, P1, K8, P1, K3
Row 4: K4, P8, K4
Row 5: K3, P1, K8, P1, K3
Row 6: K4, P8, K4

Sizing for Chunky Cable Ear Warmer
Repeat until you’ve knit the cable:
Adolescent: 9 Times
Teen: 10 Times
Adult Small/Medium: 11 times
Adult Medium/Large: 12 Times
Step 5: Finishing
With a darning needle sew the two ends of the ear warmer together. Make sure the seaming is on the inside of the project.


You May Also Like
One Comment
Karen
This looks like a fun project! Thank you!