Wheel Wreaths from Knitting in the Park
Taking up another craft inspired by the park.
While there is a lot of knitting from yours truly in the park, there is a ton of cycling too. In fact, I volunteer as a Trek Women’s Advocate. My goal is to get more women on bikes, more often. It’s a very healthy hobby that just makes people happy. My husband and I fell in love over outdoor sports including riding our bikes. So when it comes to decorating, we often incorporate them. As a result, I’ve taken up another craft inspired by the park, making wheel wreaths!
Something about an old bicycle wheel just lures me in and makes my heart sing. Maybe it’s my love of riding? Maybe it’s my love of antiques? Maybe I just love to make wreaths? Or maybe, just maybe, it’s a combination of all three!
Growing up my mom and I used to make grapevine wreaths together – in fact, when we have the time we still do! You save a tree and get a lovely rustic wreath base with which you can do so many things!
So How Does One Make a Wheel Wreath?

Finding the wheels is probably the most important step -it also can be a little challenging so I’m not going to give up my sources here.
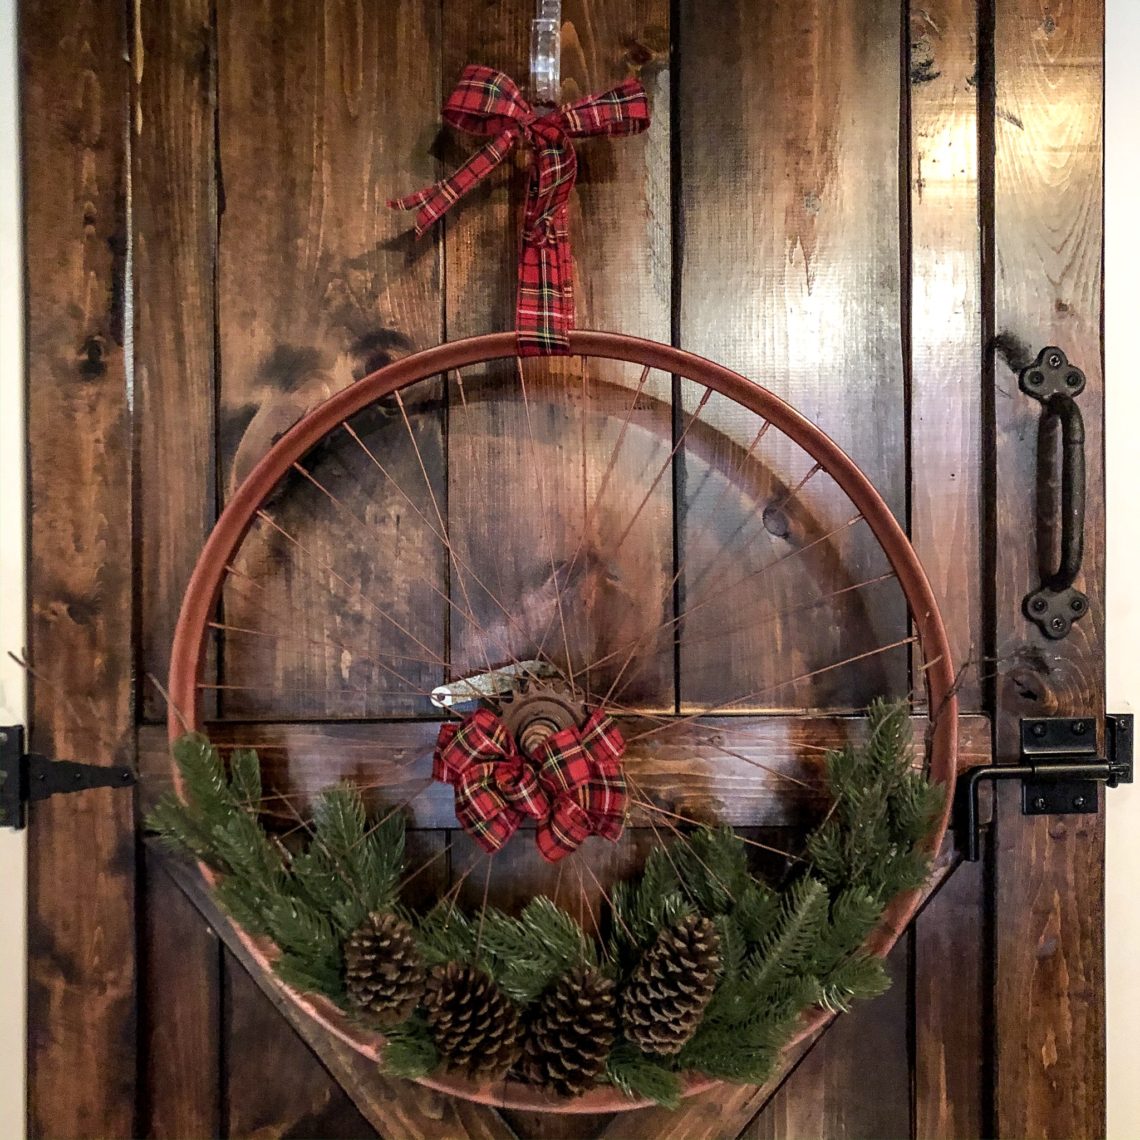
Once you do get a wheel for your wreath, an important step is to clean it up. I like to paint mine to match different decor, but you you still need a clean base for the paint to which the paint can adhere.
Afterwards, I make the decision to leave it metal, or pick a color of paint. This is hands down the most time consuming step. While I only put decorations on one side of the wreath, I paint both sides. This makes it look more “done” and will give you more options for displaying your wreath. Each side often takes about two coats of paint.
The next step is the fun part: Decorating the wreaths!
Right now I’m in the height of Christmas Decorating so of course I’m making quite a few Christmas wreaths. But I’ve also made some for spring and summer that feature fake peonies and eucalyptus. The trick is to find faux flower elements that are meant for the outdoors. Most craft stores and even supplies on Amazon are meant for indoor wreaths. The colors might fade when exposed to the elements. I’m lucky my front door is sheltered by a porch.

To affix different elements to a wheel wreath, I use a study wire. I buy a spool of it and cut it into about eight inch sections. These I wrap around the flowers and the wheel and try to twist them tightly on the bottom side of the wreath. You can either tuck in the ends or trim them.
Note: As I use the wire to attach these pieces, I weave the stems between the spokes for an extra bit of hold.
Once you have your base of flowers or elements, you can generally start sticking or weaving other bits into these. This cuts down on the amount of wire used and potentially seen when the wreath is all done.
Lastly, I bring in my husband. He got a special bit for a handheld saw/Dremel tool that we use to cut the back of the axel/bolt/hub of the wheel off. This allows it to lay flat on a door or wall and not scratch. Some wheels, especially newer ones, you’ll be able to take the bolts off and remove that center skewer. Older ones might need cut or trimmed.