How to Make One Right and Make One Left
A guide to common increases in knitting
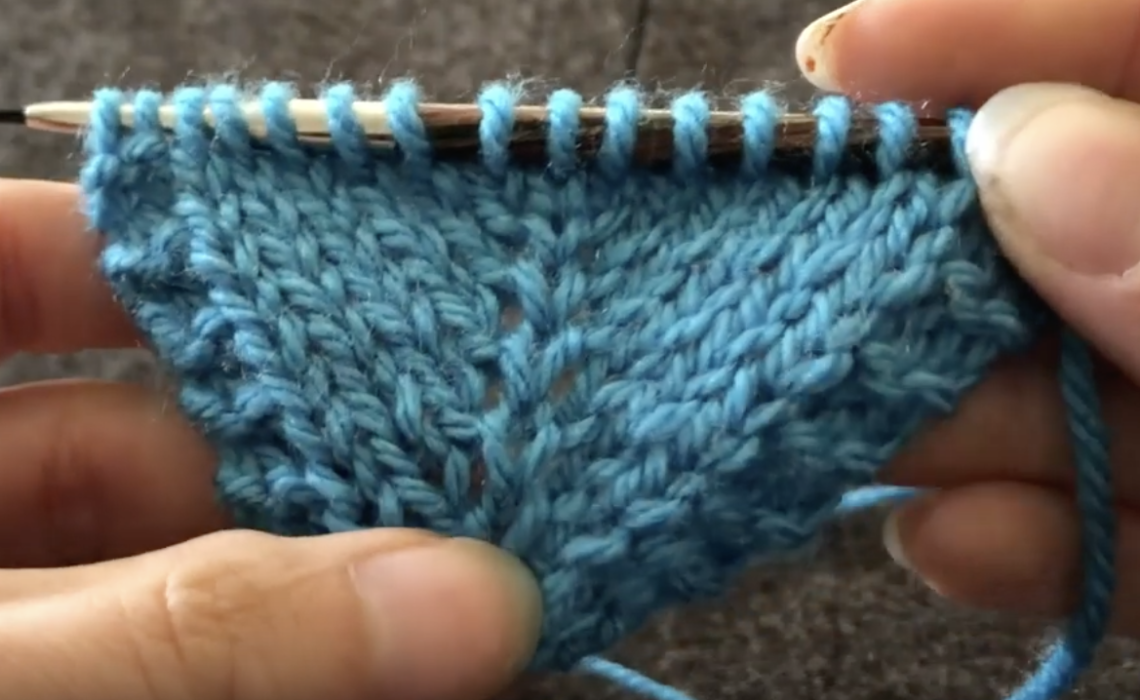
Make one right and make one left are common knitting increase methods. As their name suggests, you make one stitch either time, and it either leans toward the right, or toward the left.
The way in which you use these stitches will not only help to increase the number of stitches, but shape the project with you’re knitting. Let’s get started.
Most recently, I’ve used these in my Murphy’s Jumper Pattern.
Watch and learn how to make one right and make one left:
To work the Make One Right:
Work to the spot in your pattern where you need to work this stitch.
To begin, identify the stitch you’ve just knit, and the next stitch on your left needle. Between these will be a “bar” of yarn. We’re going to pick this up and knit it.
Either:

Using the left hand needle insert the needle from back to front under this bar and pick it up.
OR
Using the right hand needle, pick up the bar and place it on the left hand needle so that the left hand needle is inserted from back to front.
After you’ve picked up this stitch and placed it on the left hand needle, knit this stitch as normal.
Tip: Remember right is rear and this will help you remember how to work the two increases.
To work the Make One Left
Work to the spot in your pattern where you need to work this stitch.
As in the make one right, we’ll next need to identify and pick up the bar between the stitch we’ve just knit, and the stitch we need will work next.

Either:
Using your left hand needle, insert your needle from front to back, and pick up the bar.
Or
Using your right hand needle, pick up the bar and place it on the left hand needle so that it’s inserted from front to back.
After you’ve placed it on the left hand needle, knit this stitch through the back.
For more tutorials and how to’s visit this page.