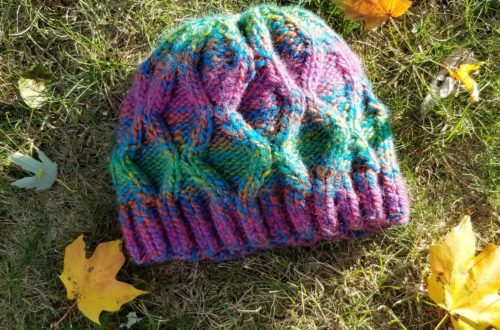
Free Pumpkin Knitting Patterns
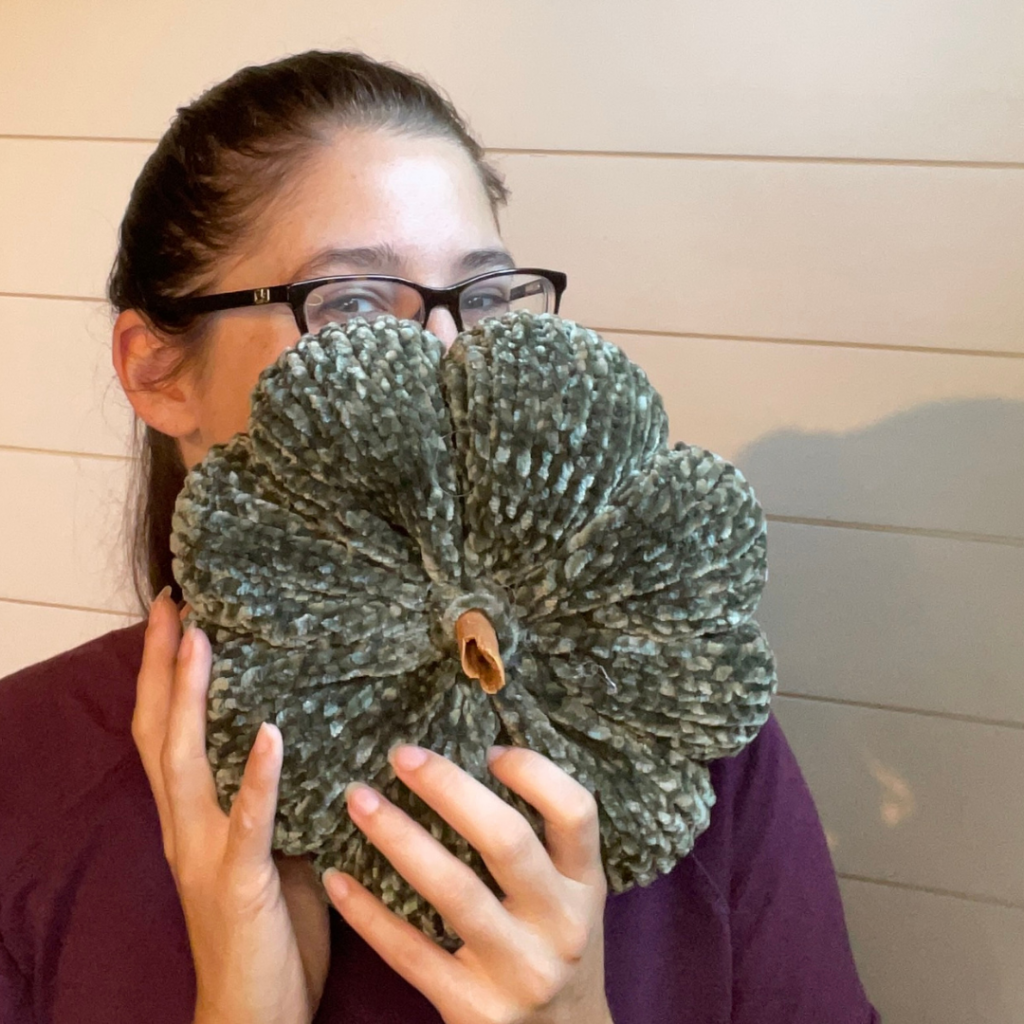
How to Knit a Veritable Velvet Pumpkin Patch
Since first knitting a velvet pumpkin, I have become hooked. Okay bad fiber artist joke. All joking aside though, I am in love with knitting pumpkins, velvet or otherwise. In this post, you’ll find a downloadable free pattern for three pumpkin knitting patterns. I’m even including notes on how to design your own! Let’s talk about these pumpkin knitting patterns.
Tutorial for Knitting a Pumpkin:
Construction:
The basic shape you need for a knitting a pumpkin is a tube. You’ll need to either knit in the round, or knit flat and then seem the edges together. There is no right way to do this, so pick your preference. Just one thing to note though, if you seem up the pumpkin there might be a “front” and a “back” to your pumpkin based on the tidiness of your seam.
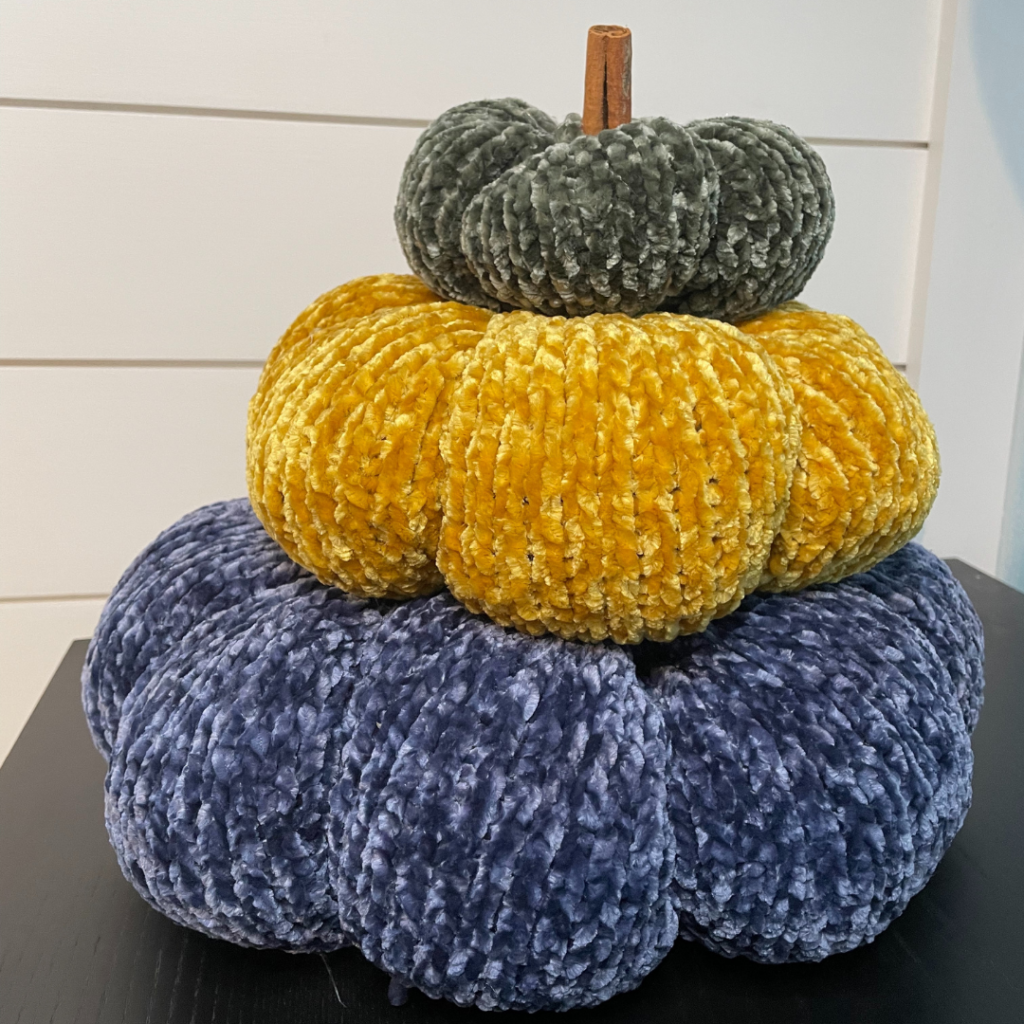
You’ll then cinch the bottom and top of your pumpkins together, filling it with stuffing, spare fabric, or crumpled paper as you go. Add your stem and chose whether you want to make a few different sizes to stack them or not.
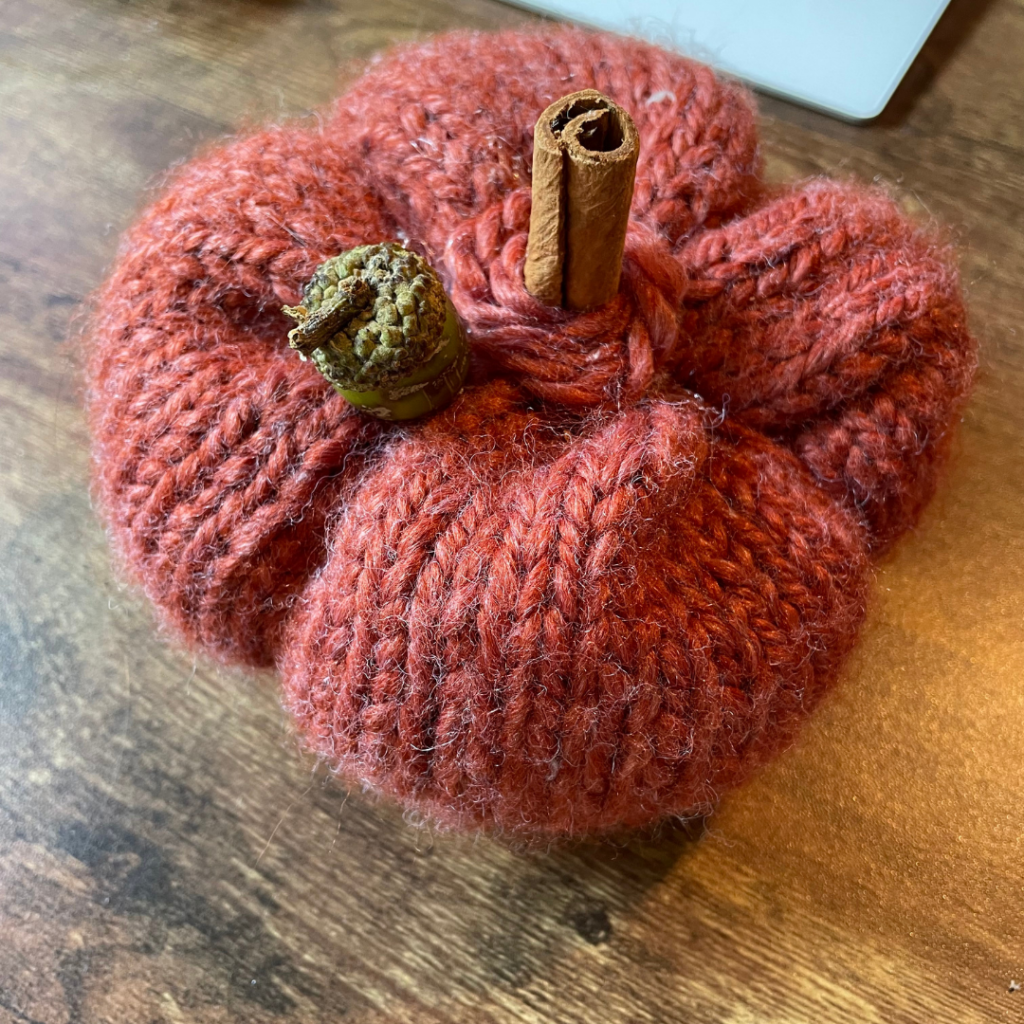
I love adding a cinnamon stick stem to my pumpkins. It makes them a bit more multidimensional and just downright adorable. You can affix the stem with hot glue – which might be my favorite part of making them. Cutting the stick combined with the heat of the glue really brings the fragrance out of them.
What You Need to Knit Pumpkins:
Your yarn of choice and a corresponding needle. I like to knit mine big and chunky, so I pick a bulky or super bulky yarn and a US size 10 knitting needle. That’s 6.0mm for friends based in other countries.
Are pumpkins big outside of the us though? (Fun fact, we get our tradition of jack-o-lanterns from the Irish and a legend about a guy cheating the devil who was doomed to roam the earth with a turnip carved into a lantern).
Any who, you’ll also need a tapestry or darning needle, some butchers twine or strong thread to use to cinch the pumpkin together. This has less bulk and generally more strength than the yarn you’re using. If you tried to get it really tight by tugging on your yarn you end up breaking the yarn and risking the fate of your pumpkin. Oh my gourd!
Lastly, you’ll need the innards and the topper. I use poly fill to stuff most of my pumpkins but I’ll also use some fabric scraps if they’re lying around. I hate to throw these in a landfill. You could use just about anything though to stuff yours depending on the weight, shape, and intended use of your pumpkin. And if you read the construction bit, you’ll need a cinnamon stick for a stem.
I’ve not yet knitted an i-cord vine for mine but I imagine that would look really cute as well.
Yarns:
Velvet: Bernat Velvet yarn
Polyester: Lion Brand Yarns Thick & Quick
Pumpkin Knitting Patterns:
Please remember these are using bulky or super bulky yarn so please adjust accordingly.
You can download the pattern here if you prefer to have it printed:
How to Knit a Small Pumpkin
Using your US size 10 DPNs, cast on 45 Stitches. Handily 45 is three sets of 15 stitches so you can evenly distribute them on three of your needles. Join taking care not to twist them. Also, you could use a magic loop here as well.
Knit in the round for 7 inches. Then bind your stitches off. Scroll down to the bottom section for instructions on how to finish your pumpkin.
How to Knit a Medium Pumpkin:
Grab a short circular needle, like one sized to knit hats in the same US Size 10 or 6mm. Cast on 90 stitches. Then work these 90 stitches around and around until you have a tube that is roughly 10 inches tall. If you’d like to knit it taller or shorter, you can achieve different shapes of your pumpkin. Jump to the “How to Finish Your Pumpkin Section” below.
How to Knit a Large Pumpkin:
Grabbing a circular knitting needle that’s a bit longer. Cast on the same 90 stitches. In the first round, *knit one, knit one front and back* Repeat these instructions until you finish working your way around the needle. Knit these now, 135 stitches for a total of 13 inches (or more). Work a decrease round by knitting one then knitting two together all the qay around. Then you can bind off. Continue reading for instructions on finishing your pumpkins.
Wrapping Up Your Pumpkin Knitting Patterns:
Cut two lengths of your twine or thread. Use one to cinch the bottom of your pumpkin by threading your tapestry needle and weaving it through you cast on edge. Pull tight and knot. You might see a little hole in your pumpkin’s derrière, but you can fix this by threading the tine from edge to edge of the hole and knotting it. About 3 times tends to do the trick.
Take another length of butchers twine and once again, thread your tapestry needle. Weave that through the stitches along your bind off edge. Cinch the top of the pumpkin a bit, but not all the way as you’ll need to stuff it. This will help hold the stuffing in as you work. Stuff the pumpkin until it looks just shy of full. If you stuff it full, it will be harder to get it to keep its shape. Cinch the twine all the way and knot. You might need to tie a few knots to get the pumpkin fully shut.
Next, Take a length of your yarn and thread it down through the center of the pumpkin. Wrap the yarn around the outside of the pumpkin, and thread it back through the center. Pull the yarn as tight as you need to achieve the desired shape. Repeat this step again and again until you have as many lumps or puffy parts to your pumpkin as you’d like.
Topping Your Pumpkin
Plug in your glue gun and cut a six inch section of yarn.
Grab your cinnamon stick. Figure out how tall of a stem you’d like to top your pumpkin with. You might want to use the full stick. That’s up to you. I like a stem that’s a bit shorter and typically cut my sticks in half. Take a pair of scissors and gently start cutting the stick as you twist it. After you work your way around the stick once, you should be able to break it cleanly.
Then take some hot glue, and create a dollop in the center of your pumpkin where you’d like to place your stem. Hold the stem in this glue until it hardens. Then squeeze a bit more glue around the stem. Use the short bit of yarn and wrap it around the stem as you go. You can tuck the yarn underneath the coils and fix it with a bit more glue.
If you plan to stack your pumpkins only attach a stem to the top pumpkin.