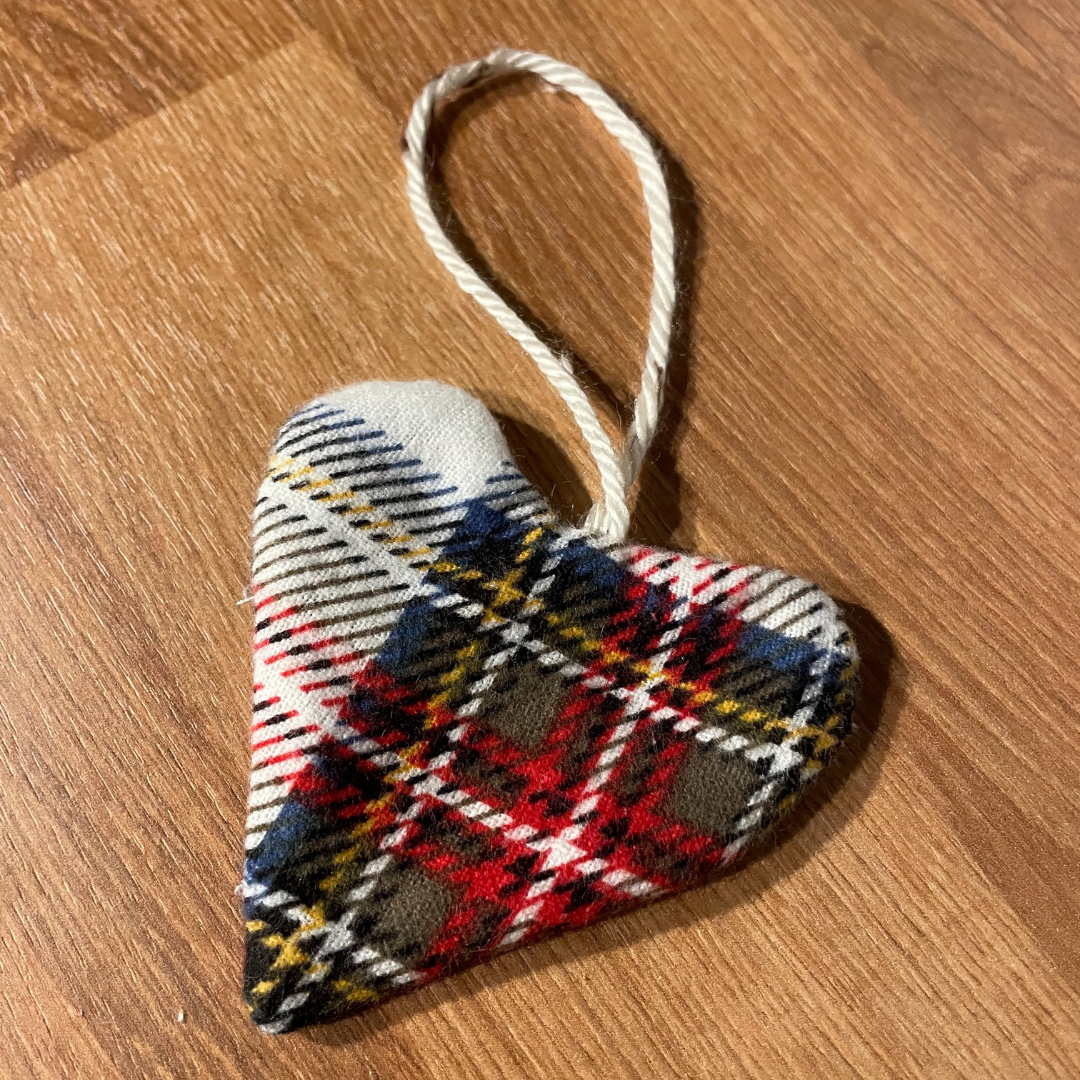
Sew Your Own Flannel Ornaments
How Easy it Is to Sew Your Own Flannel Ornaments Shaped Like Hearts
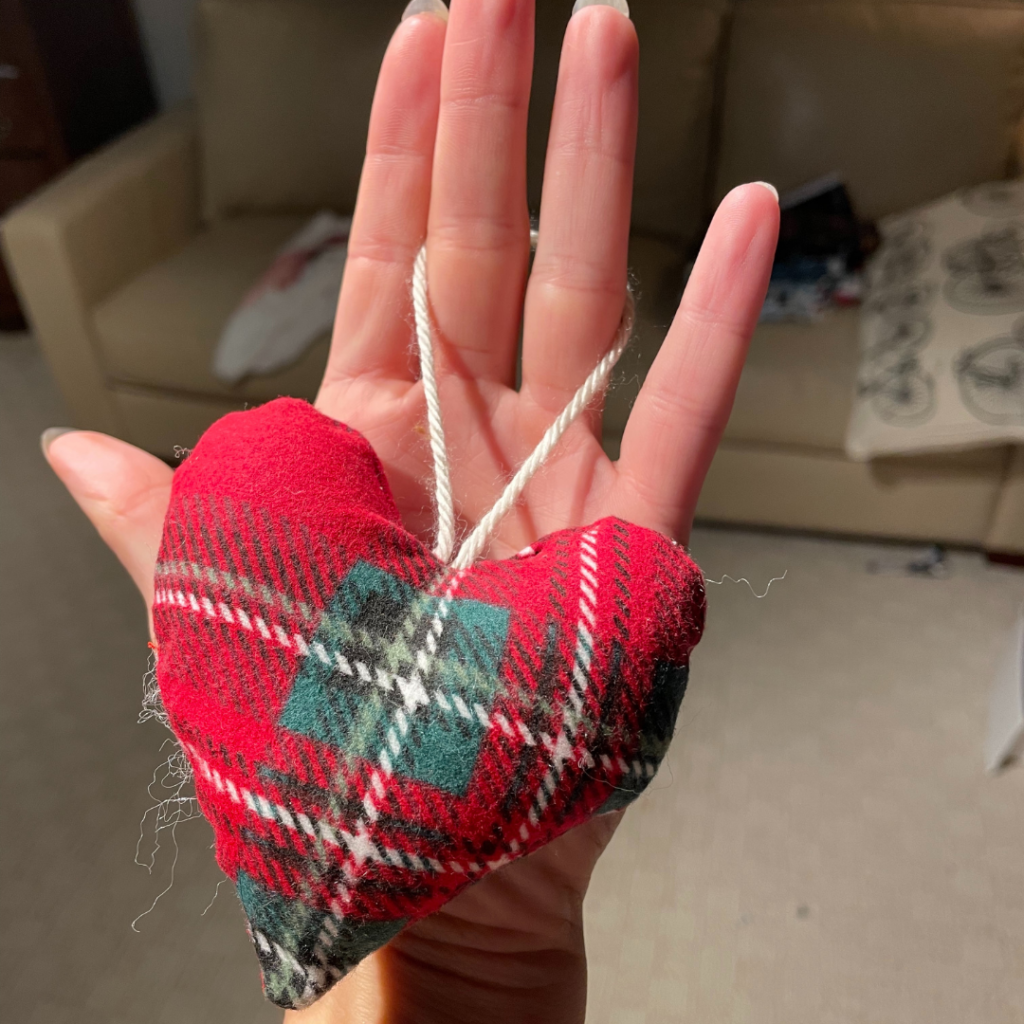
Last year I made some fun flannel mitten shaped ornaments for my Christmas Tree. We have a surprise coming up that I cannot wait to tell you about – but basically it involves me getting to upgrade my holiday decorations in a major way. Because I’ll get to have multiple places for Christmas Trees, buntings, you name it, I’m getting a head start on my crafting. In this post, I’ll show you how easy it is to sew your own flannel ornaments. You can chose any shape but for fun, I picked a heart shape.
What You’ll Need to Sew Your Own Flannel Ornaments
Flannel Fabric: I chose this white tartan, and this red tartan.
Twine, Ribbon, or Spare Yarn
Stuffing or Batting
Pins
Scissors
Marking Tool
Paper and Cardboard or Card Stock
Needle and Thread
Optional: Sewing Machine
How To Sew Your Own Flannel Ornaments
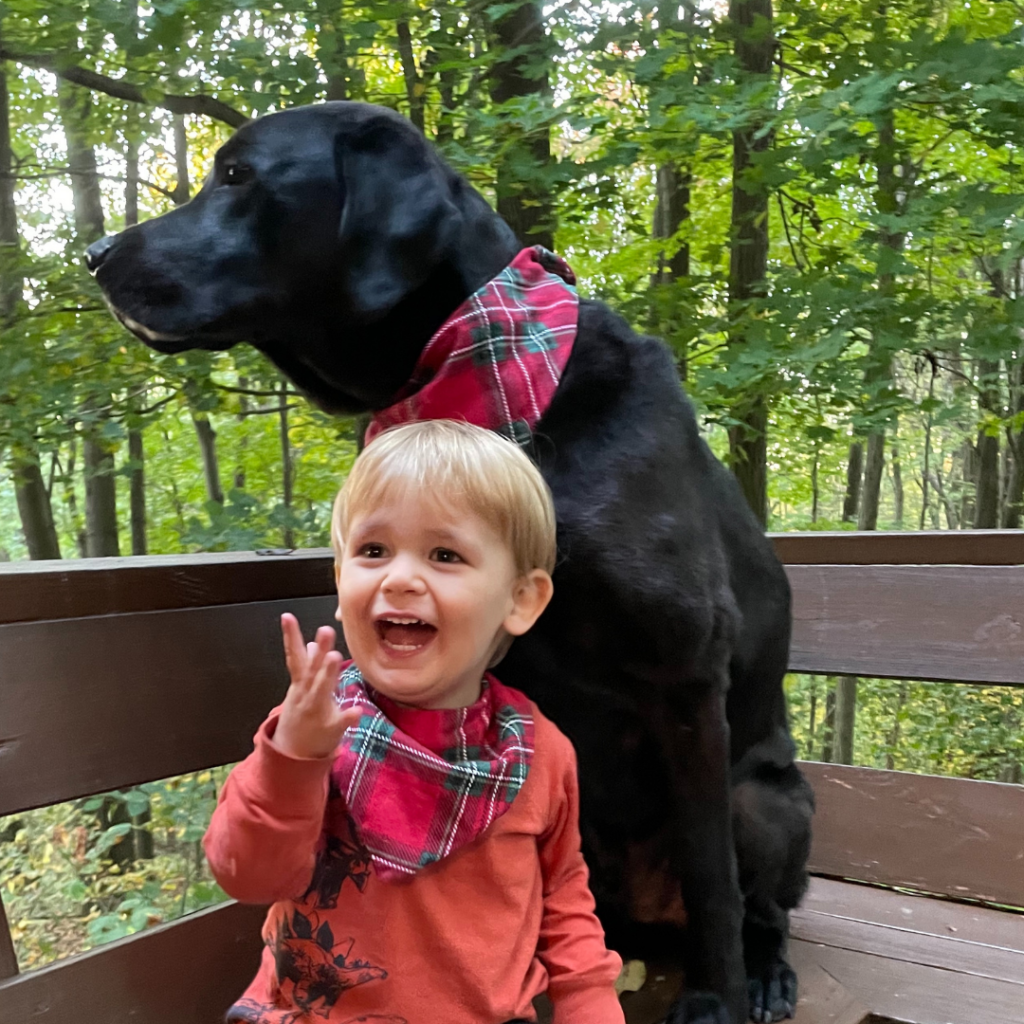
First, you need to chose your shape. I settled on hearts because that was what I was feeling. Well, that and I figured they’d be a bit easier than stars. But I might try those next after having this much fun! Who knows! I haven’t told you how much fabric you’ll need because that really depends on what size ornaments you’ll want to make, and how many you’ll want to make. Recently Joann Fabrics had their cozy flannels on sale for $2.99 per yard. I had my little one with me so we picked out two different Christmas flannels. I made him and his fur brother bandana bibs and was able to make the ornaments with my fabric scraps. 1/2 a yard should give you a solid amount of ornaments.
Prep Work:
After you make your decision, it’s time to make your template! This is where you need your paper. I started with computer paper but you could use a scrap piece of paper, junk mail, whatever you have on hand. I folded mine in half and drew half of a heart. Keep in mind that you’ll lose a bit of the size to your seam allowance. Think about 1/4 inch hall around the shape. After cutting it out, I recommend tracing the full shape of your template onto a piece of cardboard. This will make cutting out your ornament pieces much faster and easier. Just using paper, the paper will slow you down. Next, trace the shapes onto the wrong side of your fabric. Cut the shapes out of your fabric.
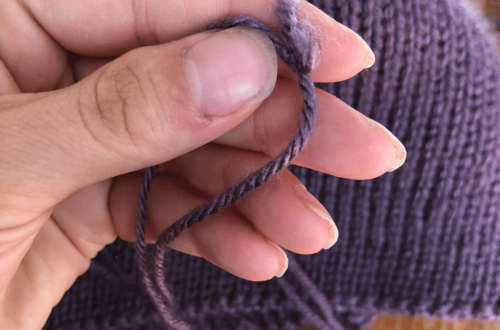
You’ll also want to cut a length of twine, ribbon, or yarn for every two pieces of fabric cut out. This will be how you hang the ornaments when they’re finished.
Note: If you’re using batting cut one pice of batting for every ornament.
Construction Time!
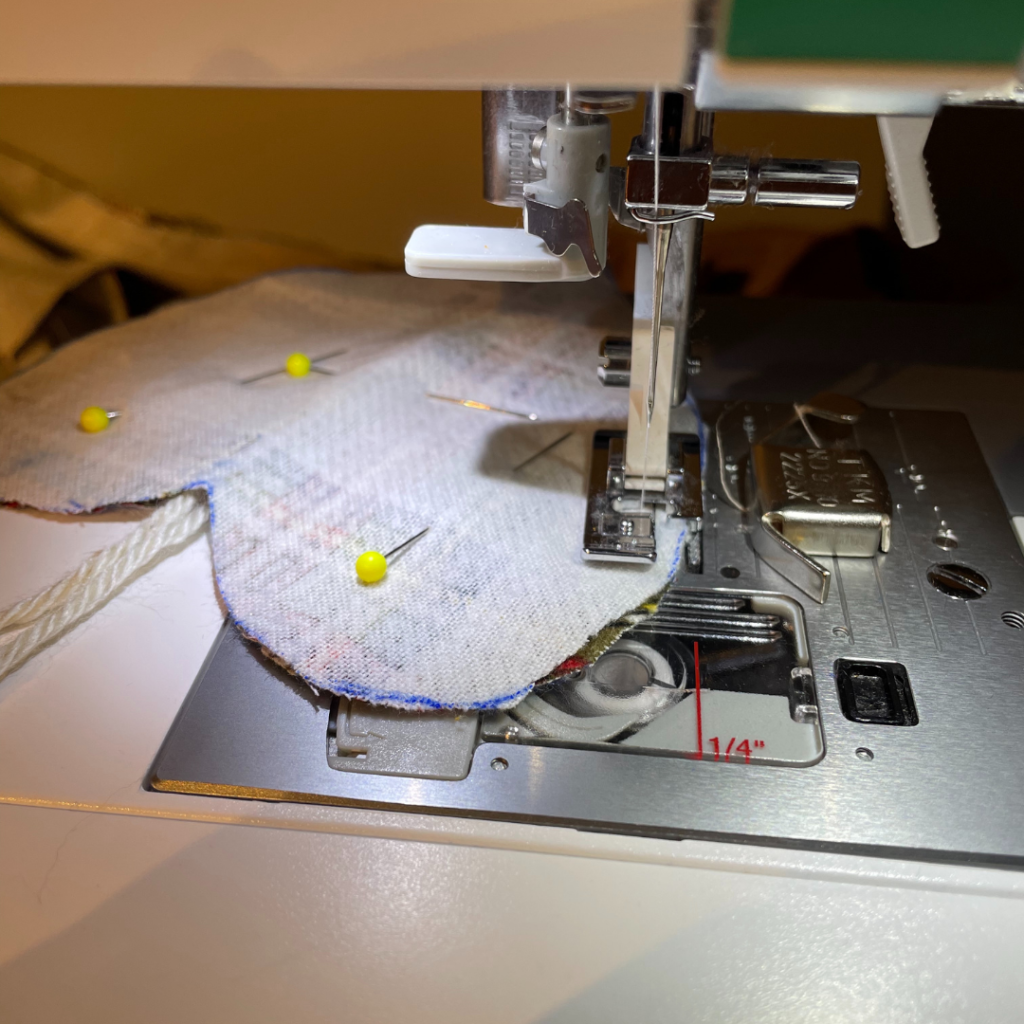
Place two shapes on top of each other, with right sides facing each other as you cut them out. Note: If you are using batting, make sure to sandwich a pice in between the two sides of your ornament. Next, take a section of twine. This part gets tricky if its your first time. You want the loop or “u” shape of the twine to be inside the ornaments, and the excess sticking out of the top of the ornament. Pin the three pieces into place. It helps to make sure to pin the twine so that it stays in the center of the ornament. This will keep you from catching the twine as you sew the two pieces together. Pin all the way around the ornament.
We’re ready to sew! It really helps to have a machine, but you can hand sew these together too. You’ll need to sew almost all the way around the ornament, but leave a little section so that you can turn the ornament right side out. I chose to start sewing just before the curve of one side of the heart and go all the way around to the same side of the heart. I left about a half an inch to an inch depending on the size of the heart. Clip the extra bits of flannel off (like at the bottom point of the heart), and snip around any curves (like the top of the heart).
Flip the ornament right side out, making sure to really flesh out the different parts of the shape. It can be helpful to iron the ornaments so that section you left un-sewn, is now even with the rest of the ornament edges, and it will be easier to sew later on. Now, stuff your ornament. Take care to push the stuffing into the various parts of the ornament.
Finishing it off!
The last step is probably the most tedious. You’ll need to hand sew the opening closed on each of your ornaments.
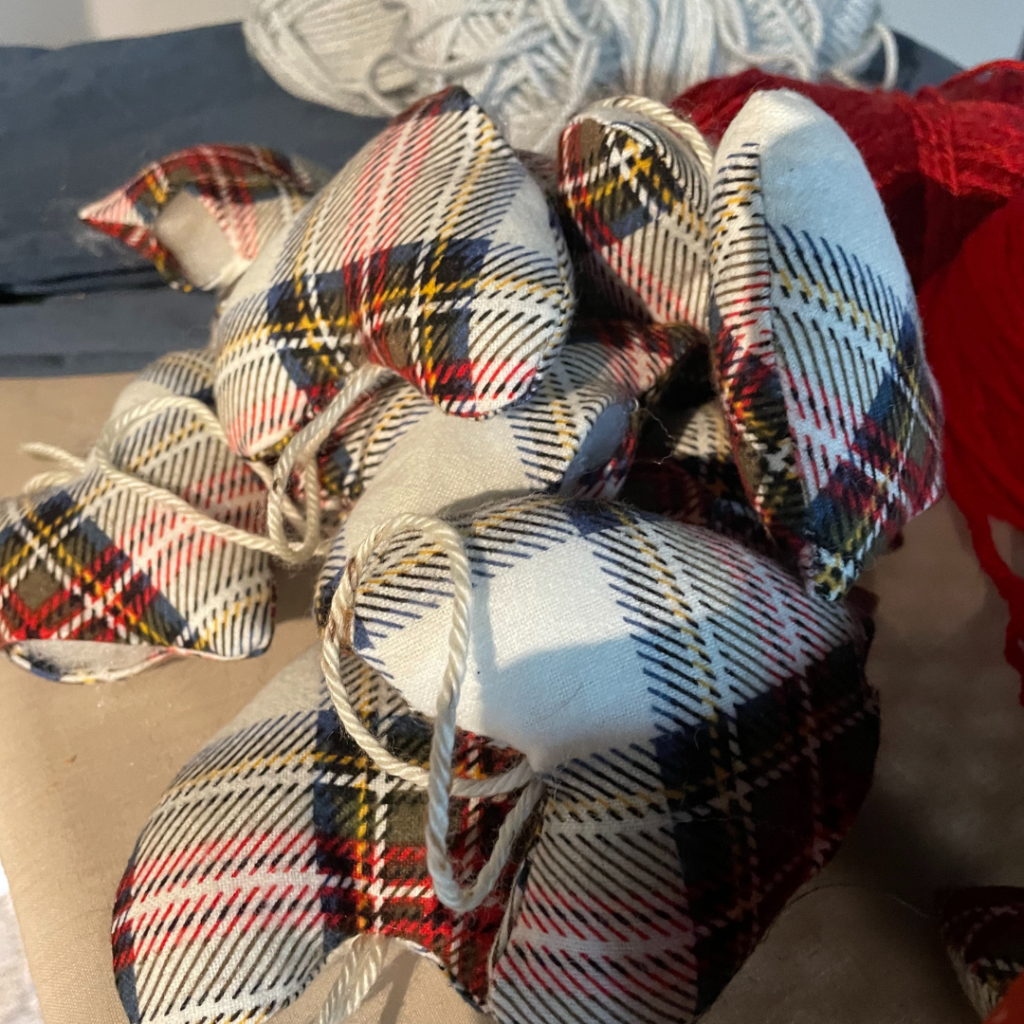
I made the larger hearts first, to get a feel for their size and shape. Then I repeated this entire process with a smaller heart shaped template. Now I’m finishing them and the bandana bibs up for Christmas!