How to Knit and Garter Stitch
The Basic Knit Stitch
One of the very first things that you will learn when you pick up the art of knitting, is the knit stitch. The art after all, shares the same name. Knitting is a series of loops made in different ways to create a project or a garment. The Knit stitch is the most basic form of the loops and can be performed over and over again to create the garter stitch. Here you can see that we have terms for individual stitches, and series of stitches.
Knit = singular while garter = repeated knit stitches.
Garter stitch can be used to make many different things, but the first project often knitted in garter stitch is a scarf. After all, a scarf is a functional project, that allows the novice knitter to practice repeating the knit stitch over and over again, solidifying their knowledge of both the knit and garter stitch.
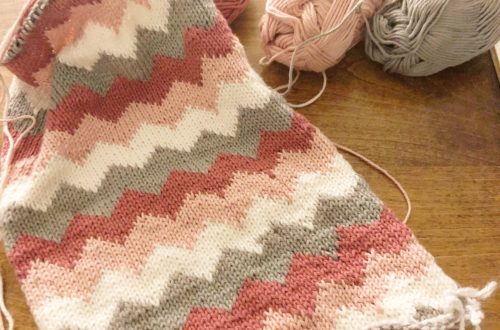
What does garter stitch look like?
Garter stitch looks a bit “bumpier” or more textured than the images we often have of “knitting”. Most people have an experience with sweaters that are smooth, or knit in Stockinette stitch, along with different variations like rib stitches and cable stitches. Garter stitch is easier, but still has merits of its own, and is often used alongside other stitches to add texture, prevent works from curling, etc. The photo below is an example of what this basic knitting stitch looks like.
How Do I do a Knit stitch?
First, you’ll need to Cast On at least a few stitches if you are creating a practice swatch or piece of knitting. If you are jumping right into making a scarf or other project, you’ll need to look for cast on (CO) instructions and identify the appropriate number of stitches to create on your needle. There are many different ways to cast on, but the most basic is the knitted cast on.
How to Cast On and create your first stitches
Next, is the actual knit stitch itself.
Hold the needle with the stitches in the left hand, and the empty needle in your right.
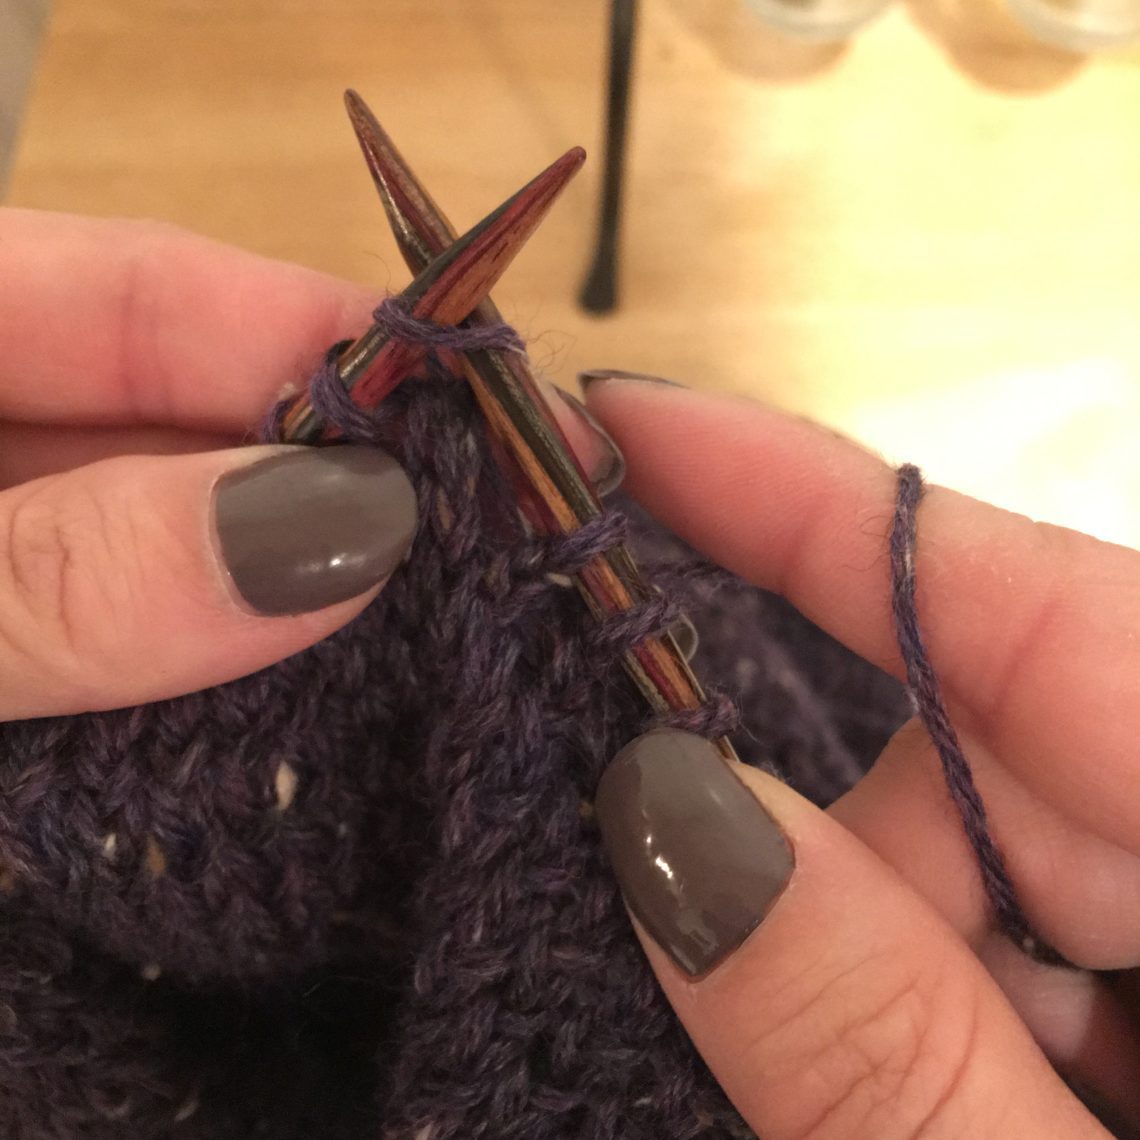
Insert the left hand needle, into the first stitch or loop on the left hand needle, from the front (left side of the needle) to the back.
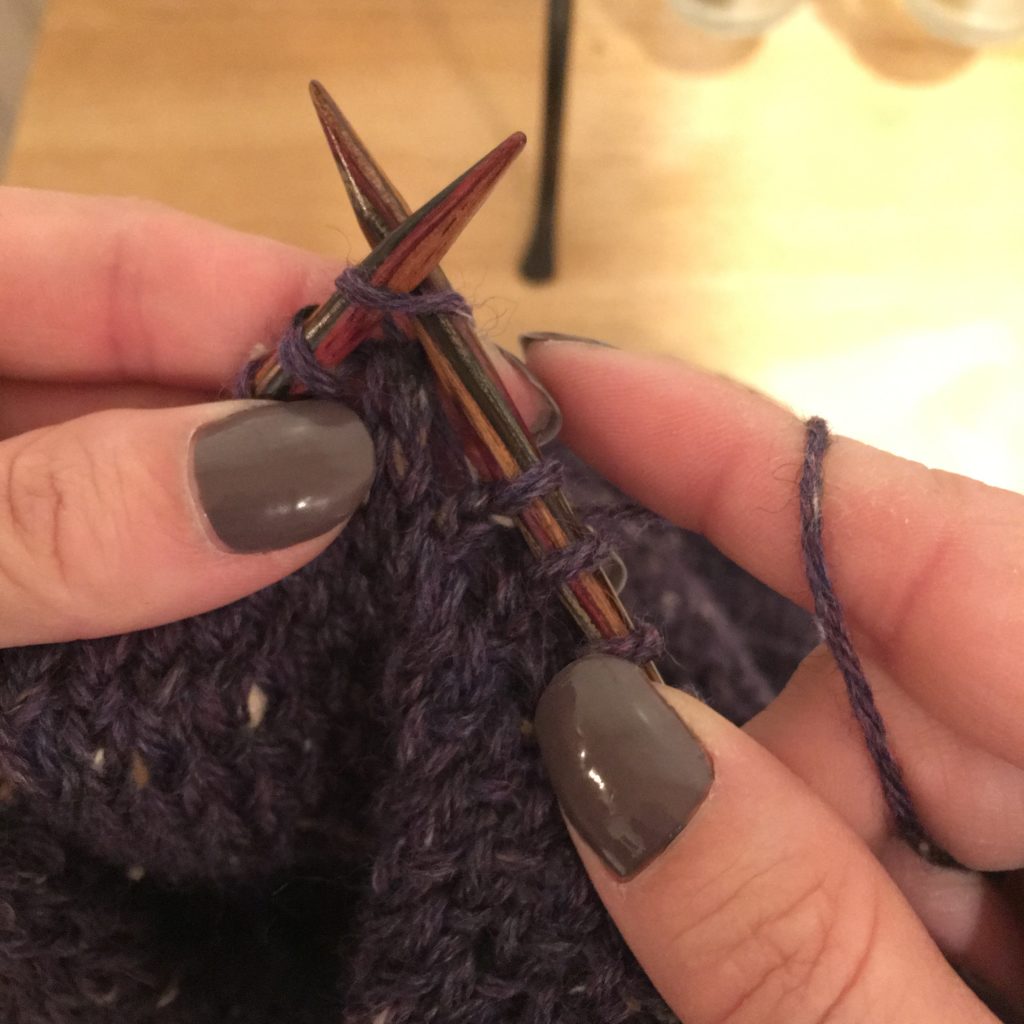
Wrap your yarn around the inserted needle (right hand needle) to create a new loop. Next comes the tricky part, but don’t panic.
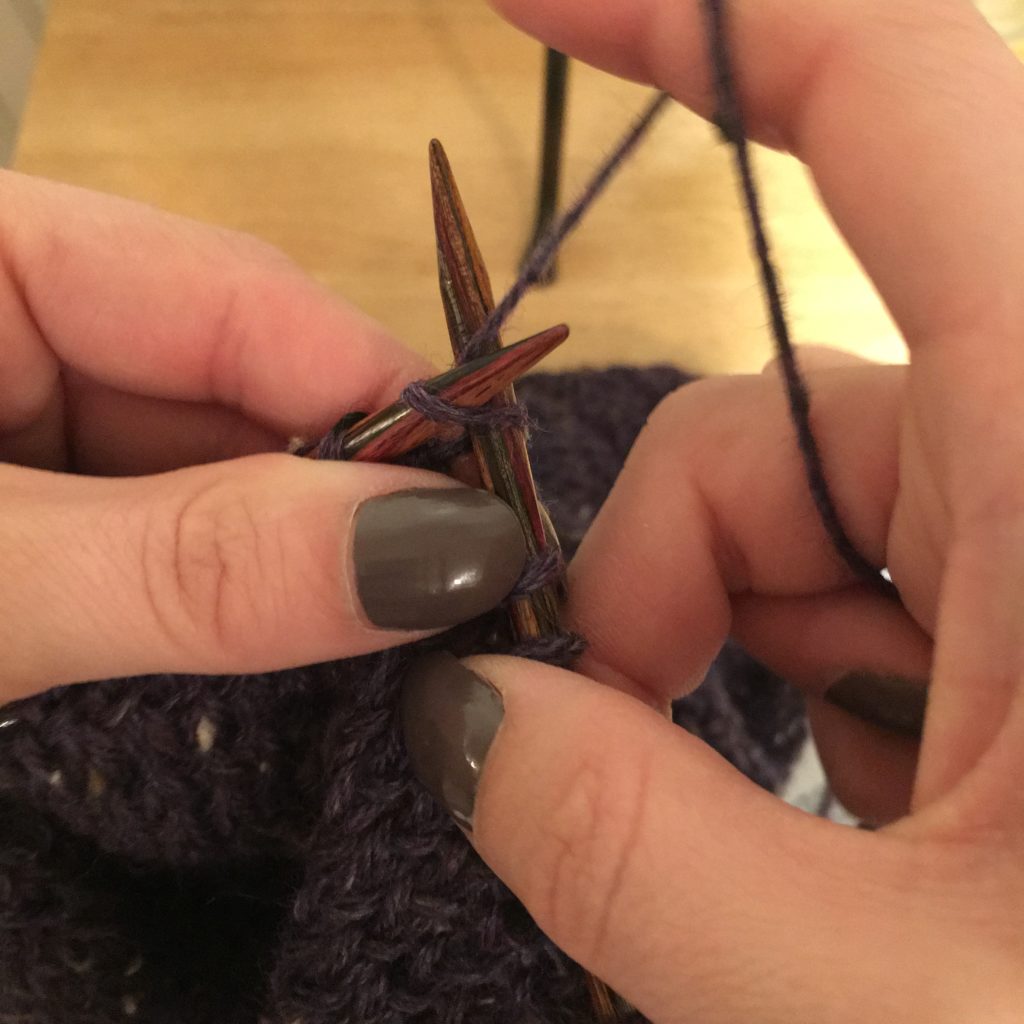
Holding the yarn so the new loop will not slip off, bring that new loop back through the stitch. You’ll see that there is now a loop around the right hand needle, so you can gently slide that stitch that you just worked off of the left hand needle.
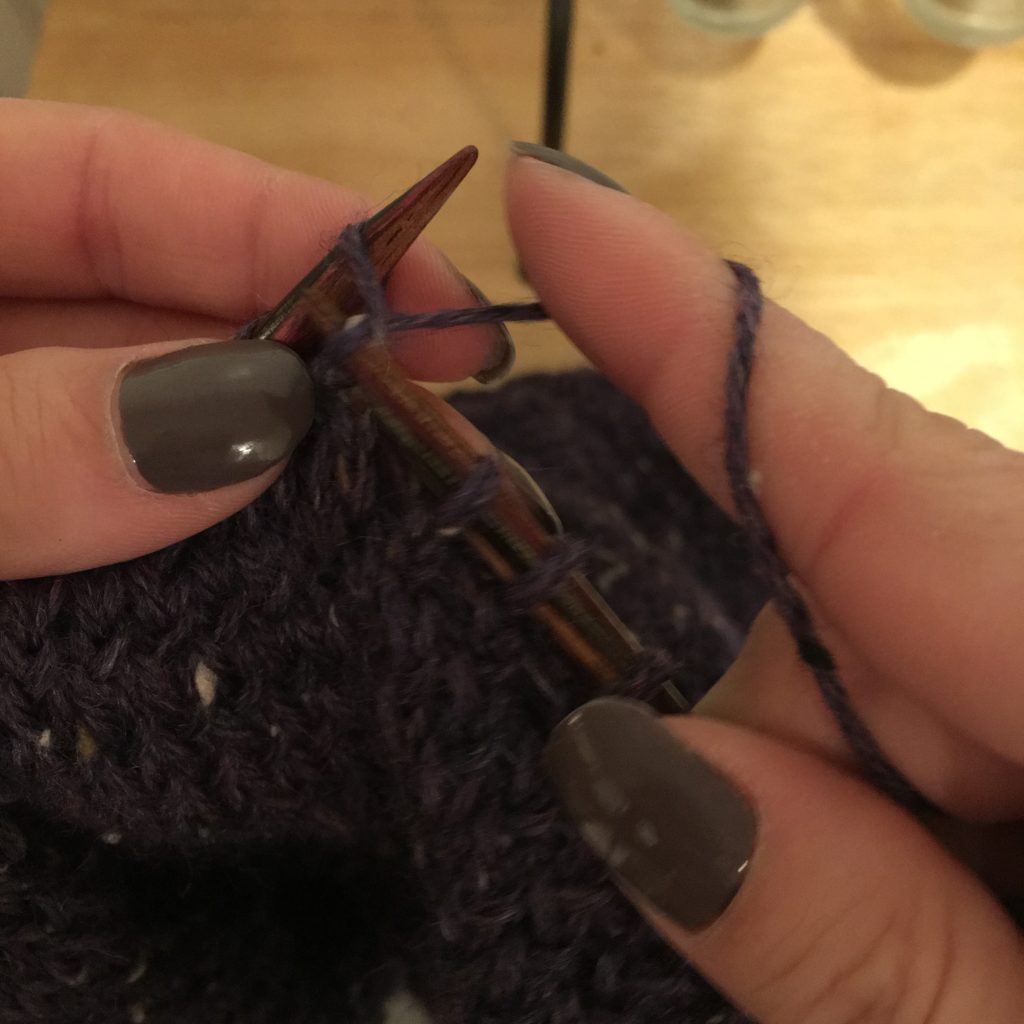
Repeat the process.
Soon you will become faster and more confident working this and it will seem like a breeze. If you did not get it the first time, try it again maybe moving the right hand needle in a different way. Some tutorials will instruct you to “push” the end of the right hand needle away from you, brining the tip of the needle back towards you.
Looking for a simple pattern? Try the Puppy Scarf
What Happens if I drop a knit stitch while working in garter stitch?
First, don’t panic. This happens all of the time and is an “easy” fix once you try it for the first time.
Tip: it’s helpful to have a crochet hook or spare needle handy for this. Most often you will see people recommend a crochet hook in the same size as your needles. This isn’t super necessary – especially if you are just starting to learn to knit, as it will likely send you running to the store to buy something you don’t absolutely need.
We started off this page by saying that knitting is a series of loops. When a stitch falls off of your needle, some of these loops may come undone. If you are working with thicker yarn that’s a bit more textured, you may get lucky and that stitch might hold it’s shape. But if not, and your stitches start to come undone, you are not doomed to rip the whole thing out and start over.
First, identify the nearest intact stitch. It may be a couple rows down from where you are currently working. Insert your spare needle or crochet hook here to stop the stitch from going any further. (You can also pinch it with your fingers)
Next comes the hardest part, and after a few tries you’ll be sure to get it right!
Based on the stitch that you have caught, you’ll need to identify which side of the work the next bump of the loop should fall on. Once you do this, you’ll be able to alternate the way you work the loop back up to your needle.
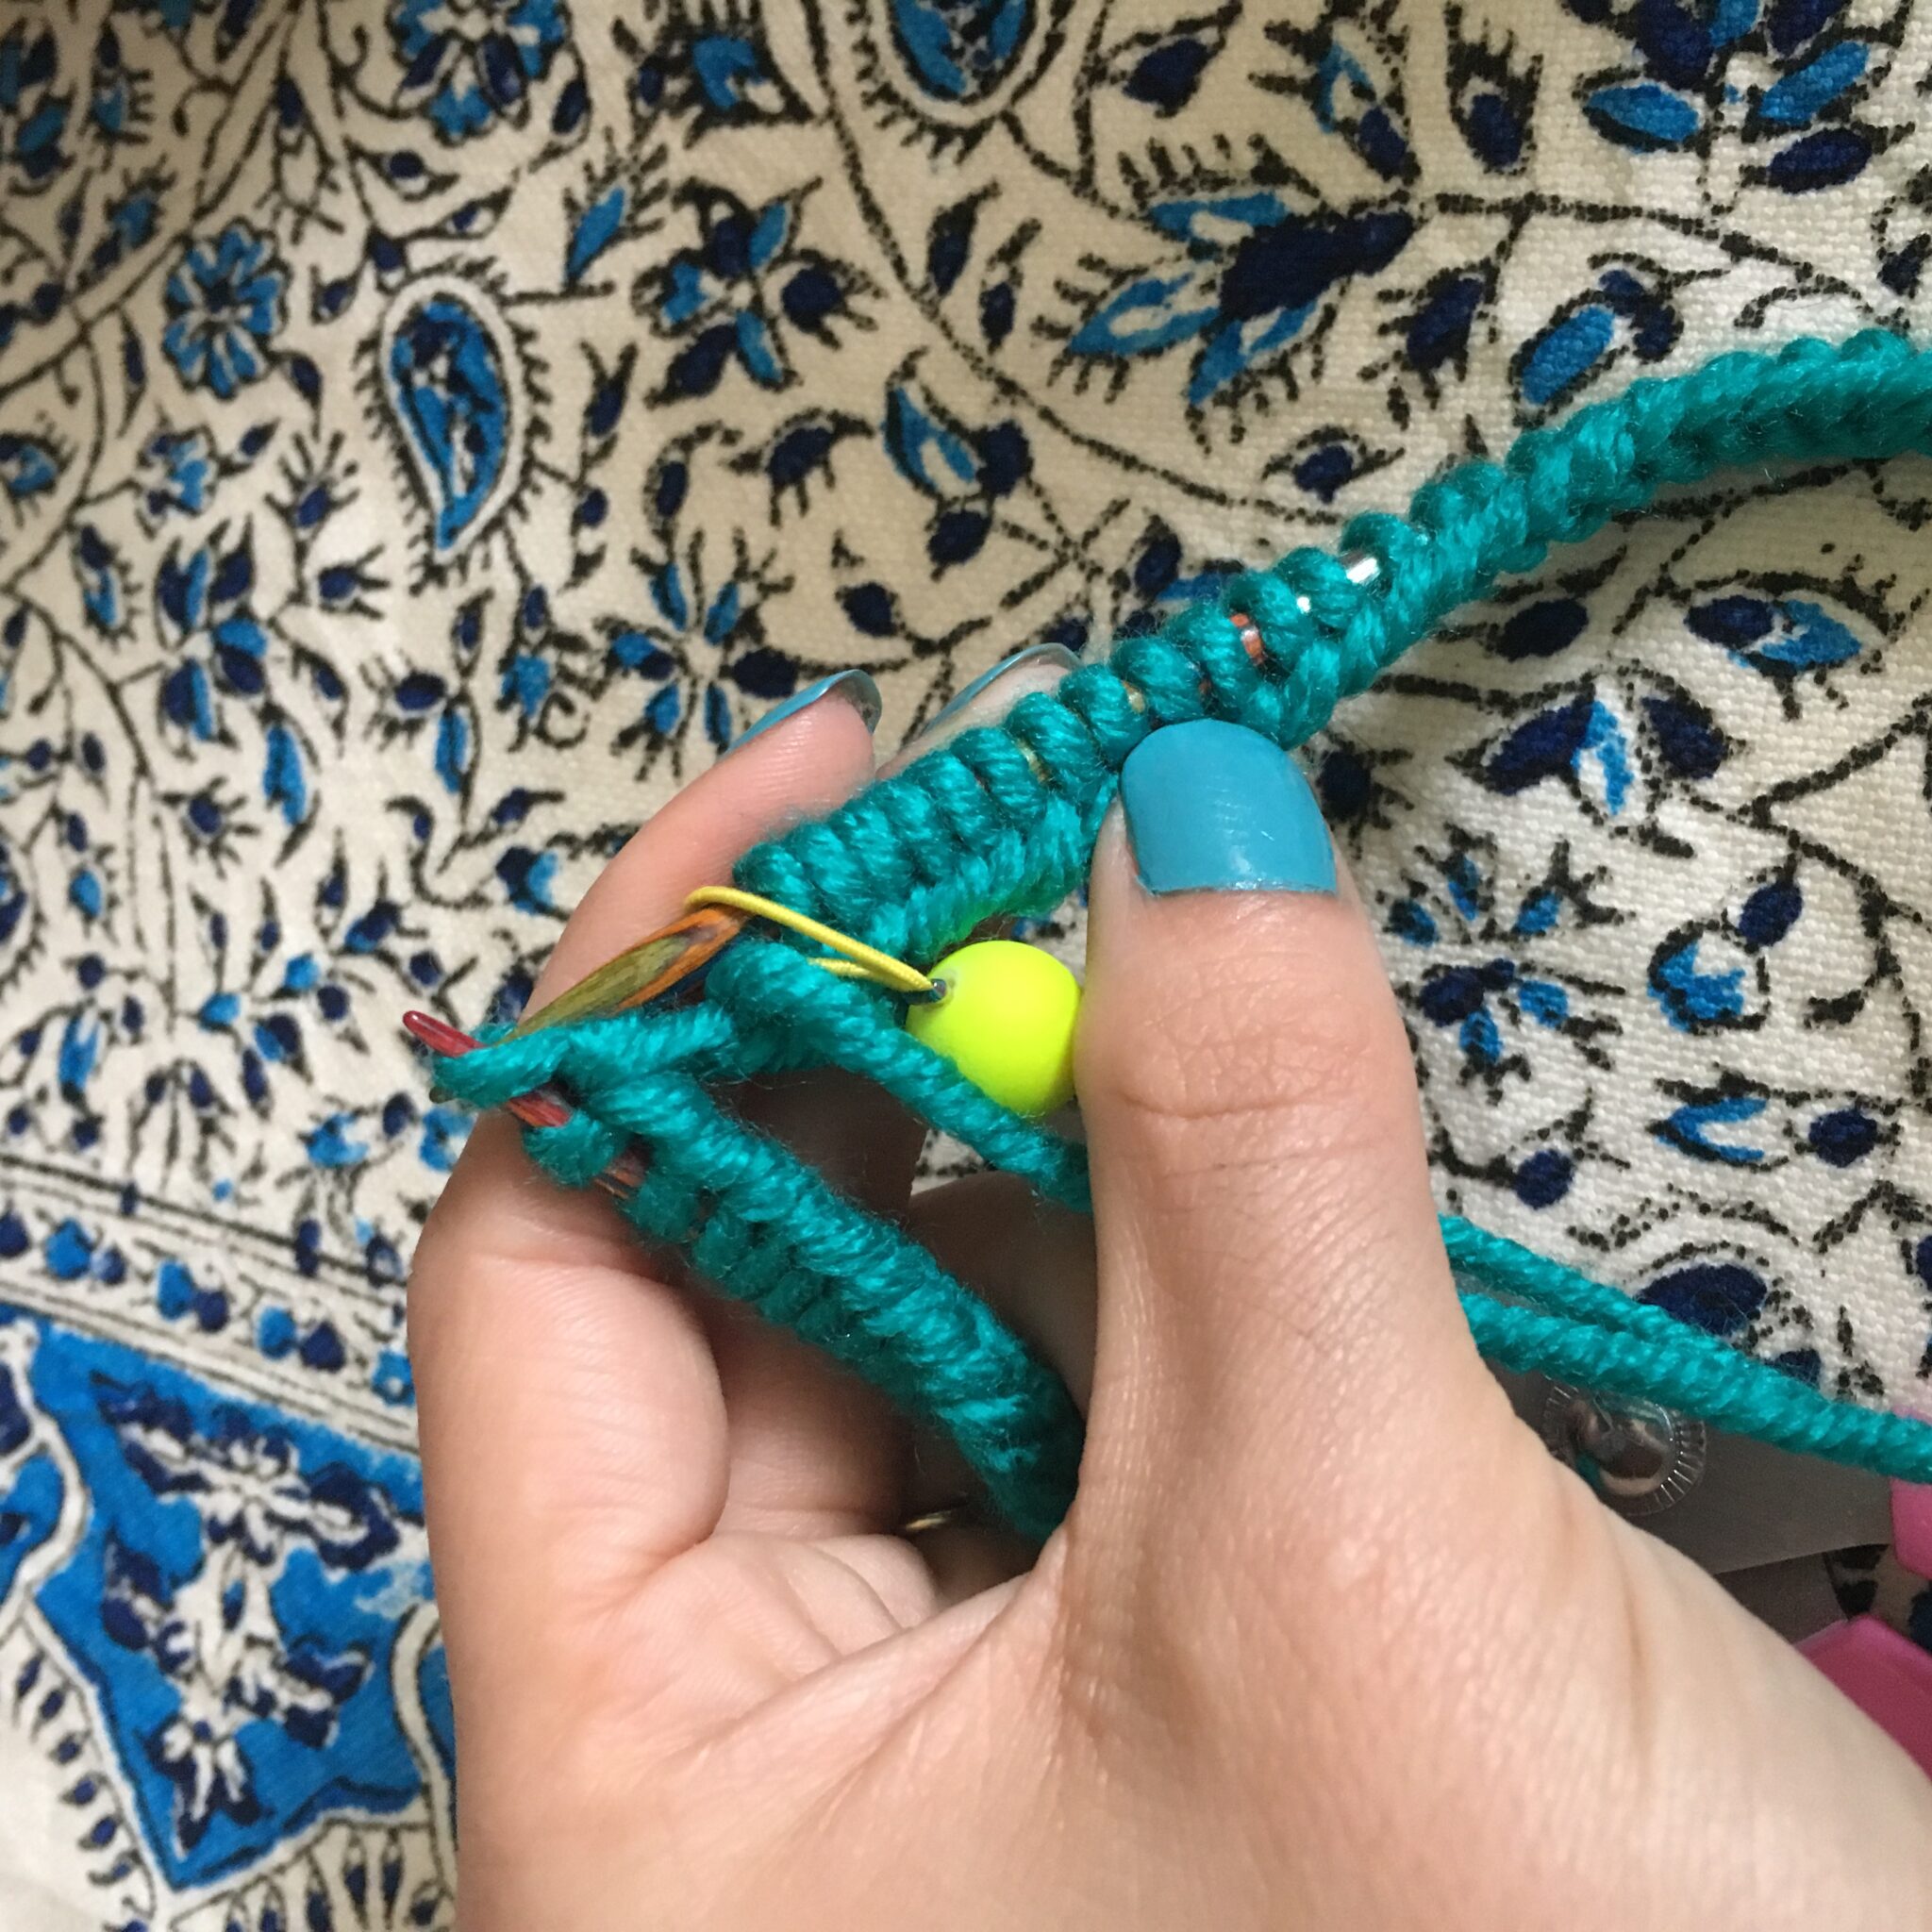
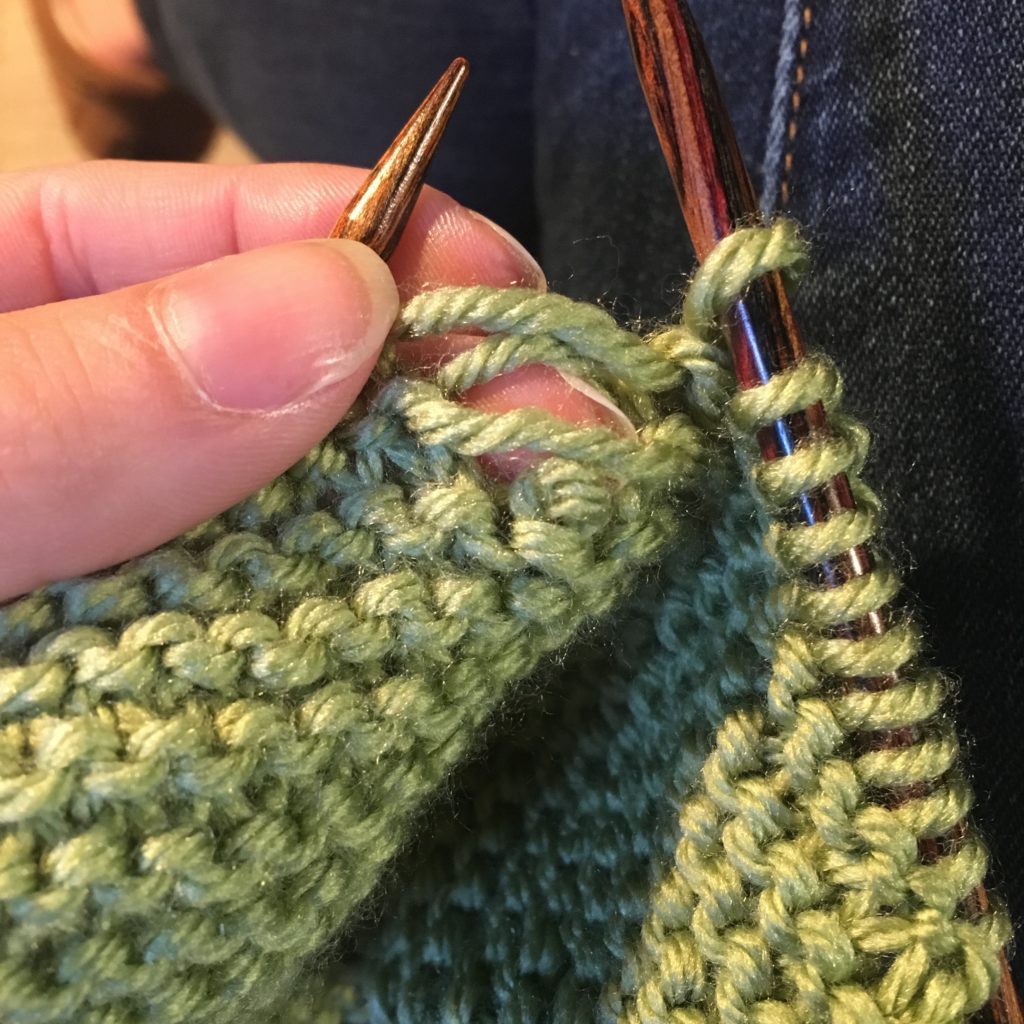
In the photo below, you can see there are three strands of yarn above the stitch that has not been “caught” on my crochet hook. This means that I have lost three stitches, or the stitch has gone down three rows.
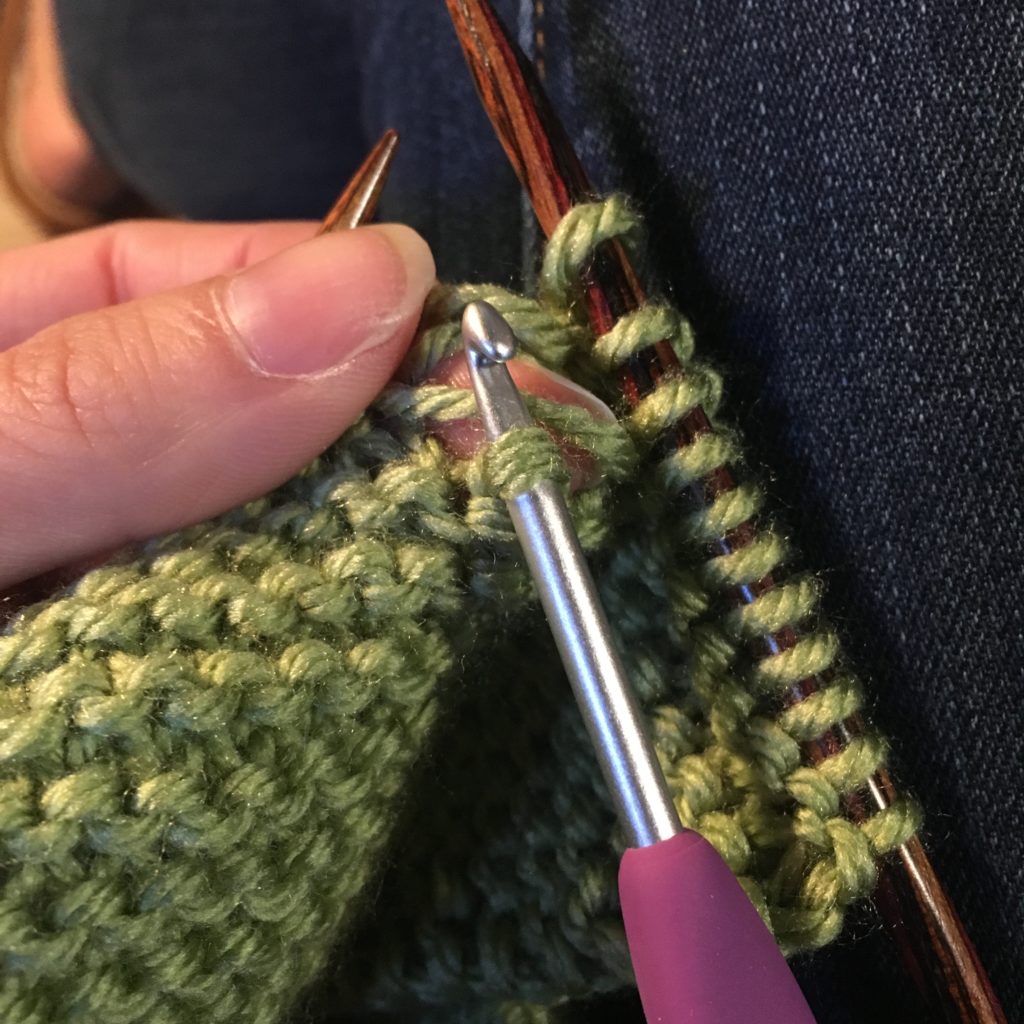
Note: I’ve actually caught this stitch on the wrong side. If I placed that first strand of yarn or bar, over my crochet hook and pulled it through the loop, the bar would fall on the incorrect side. So I have to carefully remove my crochet hook, turn the work over, and insert it.
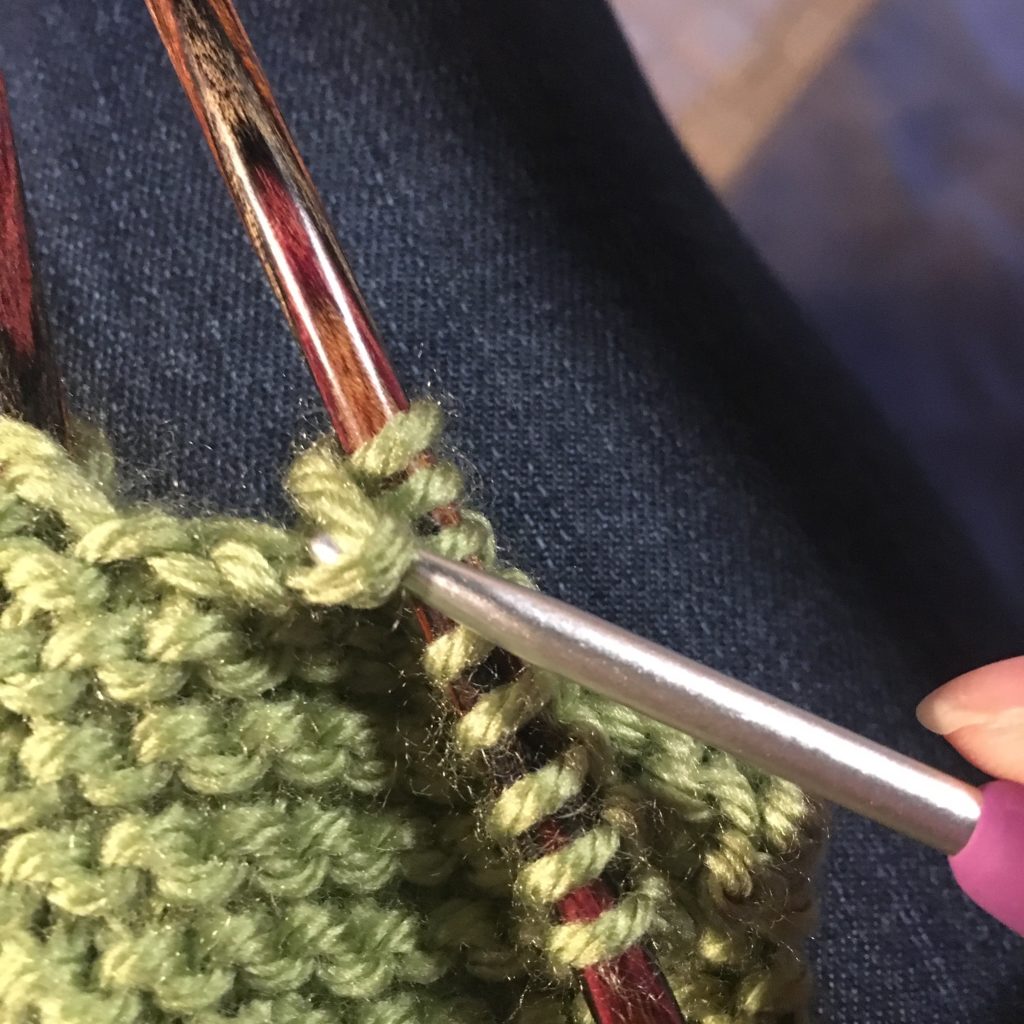
To crochet the stitches back up to the current row you are knitting is simple. Insert the crochet hook, lay the next bit of yarn or bar (like a ladder you work from the lowest to the top) overtop of the hook. Use the hook part of the crochet hook to catch the bar and pull it through the stitch that is on the crochet hook.
To work the next stitch for garter stitch, you’ll want to flip the work over. Re-insert the crochet hook and repeat the process.
If you’re ready to learn how to purl, click here.