Crochet Holiday Wreath Tutorial
This quick project is loads of fun and can be customized for anyone’s tastes. Recently I’ve made a crochet holiday wreath and feel like it’s just too much fun to gate keep or put behind a paywall. This is a fairly basic craft but it would help to have some familiarity with crochet to get started.
That said, a warning to other crocheters: I am still learning and if you’re new here I write my patterns a good bit differently than others.
Crochet Wreath Tutorial
Materials:
- Styrofoam Wreath Form
- Bulky or Chunky Yarn (One Skein)
- Crochet Hook
- Felt
- Stuffing
- Embroidery Floss
- Thread
- Beads
- Sketching Tool & Paper
- Hot Glue
- Hair Clip
- Themed Ribbon.
Tutorial:
Let’s get into it! What you’ll need is one of these styrofoam wreath forms. You can also find these at craft stores like Michael’s and Hobby Lobby. This will be the base or structure for the wreath. The wire forms are fun and allow you to create a different shape of wreath. The round styrofoam forms give this fun and fluffy structure which I like.
The yarn choice is pretty forgiving here. Stick to the larger or bulkier yarns to make it easier to finish the wreath, and achieve a larger scallop edge. I’ve been using chunky yarns from Michaels for these projects. Whatever yarn you pick, select a corresponding crochet hook.
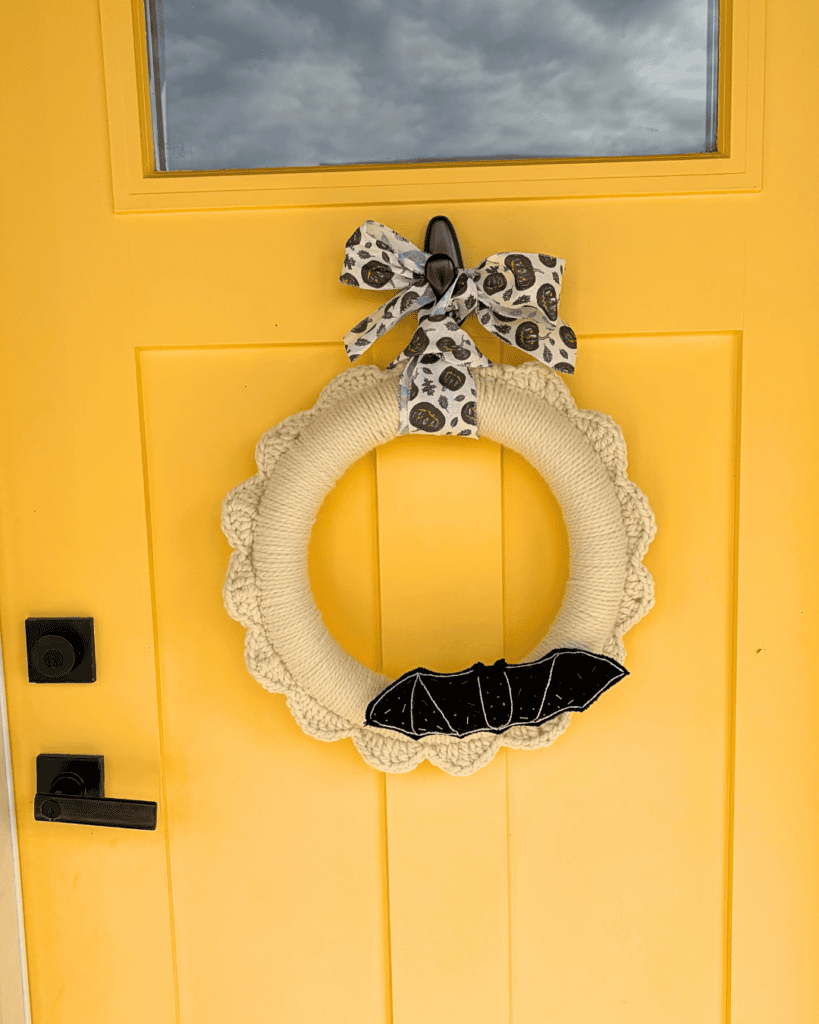
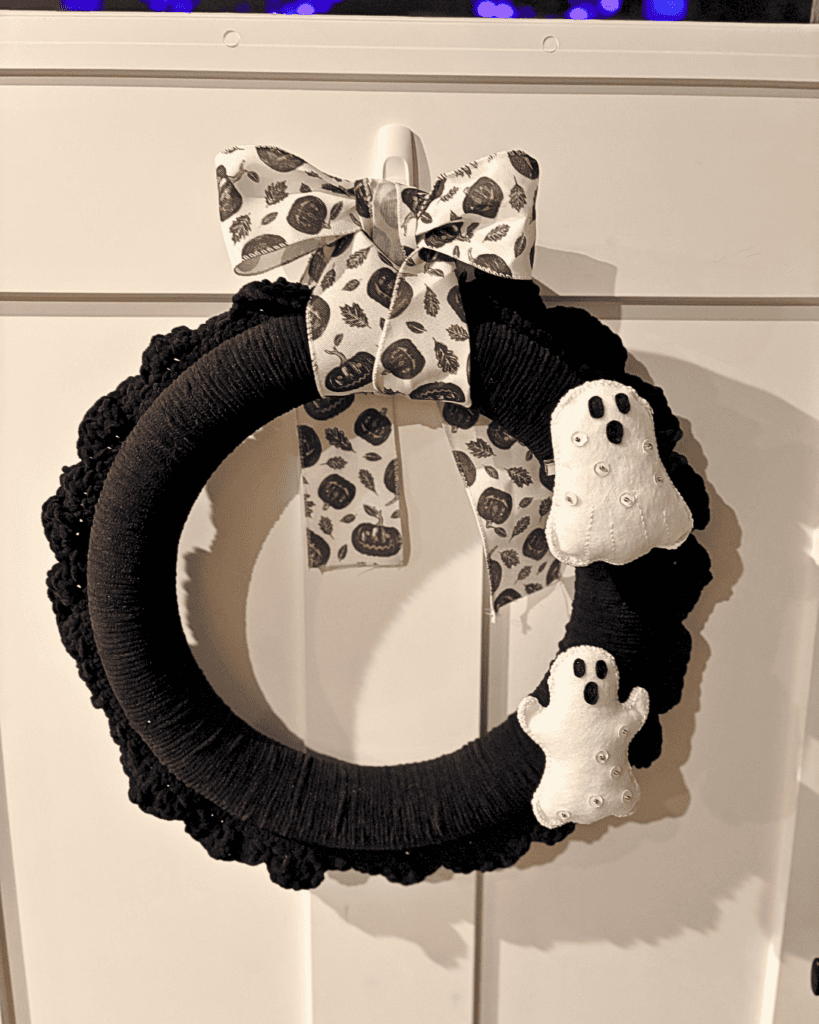
White Wreath: Lionbrand Thick & Quick Yarn and US Size L Crochet Hook
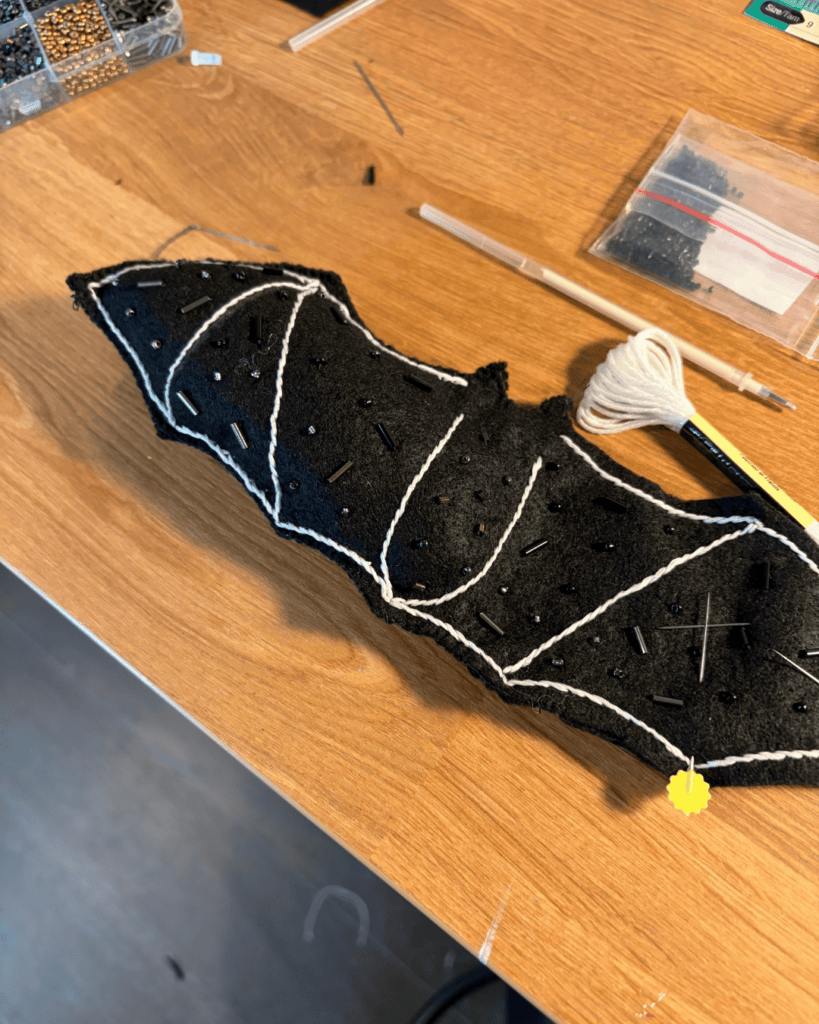
Black Wreath: Big Twist Posh Chic Yarn and US Size J Crochet Hook
Step One: Covering the Wreath Form
Start with a slip knot.
Hold the wreath form in front of you. Holding the crochet hook at the top of the form. Reach hook down through the center of the hoop, and grab the working yarn. Pull it up to the top of the form.
Work a slip Single crochet: This works through the loop you just created with the working yarn and the slip knot anchoring the project
Continue working this way around the whole wreath form until the form is no longer visible.
Step Two: Scallop Border
In the first stitch: Work two half double crochets.
Move to the next stitch: Work two double crochets.
In the third stitch: Work one Triple Crochet.
In the fourth stitch: Work two double crochets.
In the fifth stitch: Work two half double crochets.
Skip a stitch.
Slip Stitch.
Skip a Stitch.
Repeat the process.
Break your working yarn and knot it.
Then weave in your yarn tails with a tapestry needle.
Step Three: Embellishing Your Wreath
Pick your shape. I’ve done ghosts and bats and they are so cute. I want to try old fashioned pumpkins with black and yellow accents next.
Grab some paper and sketch out your design. You can do the whole thing, or just half, then fold your felt in half and cut two layers at once. Cut out a front piece and back piece.
Using a heat erasable pen sketch out where you would like your beads, lines of embroidery floss etc. Gather your materials and then get to work.
Cut your felt.
Stitch your embroidery floss to create accent lines.
Add your beads or sequins with finer thread. I’ve been using a blanket stitch.
Start stitching the two pieces together, leaving a hole to put the stuffing through.
Stuff your project.
Finish stitching around the edge.
Hot glue the clip to the back of your project.
Add your project to the wreath.
Using the themed ribbon, cut a section of ribbon about as long as your arm or a little longer.
Fold the ribbon in half.
slip the fold from the front of the wreath to through the back. Then pass the ends of the ribbon up through the loop created by the fold.
Tie your knot or bow and trim the ribbon ends to the length needed to achieve your desired look.
Hang your wreath!

You May Also Like
Knit Front Slip Back
Creative and Cost-Effective Kids Art Display